Installation and Licensing
Installation Overview
There are four parts to the installation process:
- Install Toolbox program
- Licensing
- Merge gINT library objects
- Merge gINT project table to your project file and your data template
Datgel Photo Tool Download
Download the Photo Tool package and Datgel Toolbox Installer:
- Full version: https://www.datgel.com/customer/downloadableproducts
- Trial version: https://www.datgel.com/trial-software
Package Contents
The package download from datgel.com which normally has the following folders:
- \Documentation
- \gINT Files
Install Datgel Toolbox
Before Installation
A few basic preparations can help ensure an effortless installation.
- Make sure that the computer where you plan to install the program meets the minimum hardware and software requirements.
- Connect your PC to Internet before installation (the process may need a working Internet connection).
- The Datgel Toolbox program requires that the Microsoft .NET 4.8 framework is installed on the PC prior to the installation of the Tool. If your PC does not have this, then it will be automatically downloaded and installed during the Tool installation process.
- Log into the PC with Administrator privileges before starting installation.
- It is recommended that you exit out of other applications that maybe running on your PC.
- Close gINT before you start installation.
Installation
- Run the installer, typically named Datgel.Toolbox.20##.#.#_YYYY-MM-DDTHHmmss.exe.
- When you come to the Components screen, be sure to select this product, or you can simply install all Components.
- The gINT*.exe.config files for gINT versions V8i and 10..# are edited by Datgel software during installation.
Datgel Licensing
Merge gINT Library Objects
In the trial version of the Photo Tool, the library will be locked and you cannot merge any gINT Library Objects into your Library file, or make changes to this Library file. In this case, you have to use the locked library as-is.
If you have purchased the Photo Tool, then you have full access to the library objects, and you may proceed with the following steps to merge the gINT Library components into your Library file.
If you are currently using an AGS RTA type database you should delete old AGS RTA related tables and merge the new DGD tables.
If you are upgrading, best to delete all old related fields and tables from the library and project, and merge the new ones.
- Make a backup copy of your existing library file. By default this is located in: C:\Users\Public\Documents\Bentley\gINTCL\libraries
- Extract the gINT Files folder from the downloaded .zip folder to your PC or a file share.
- Start gINT and open the library and project file you wish to use with Datgel Photo Tool.
The opened project and library files are displayed at the top of the gINT Window.
- Select UTILITIES | Lib Merge/Copy.
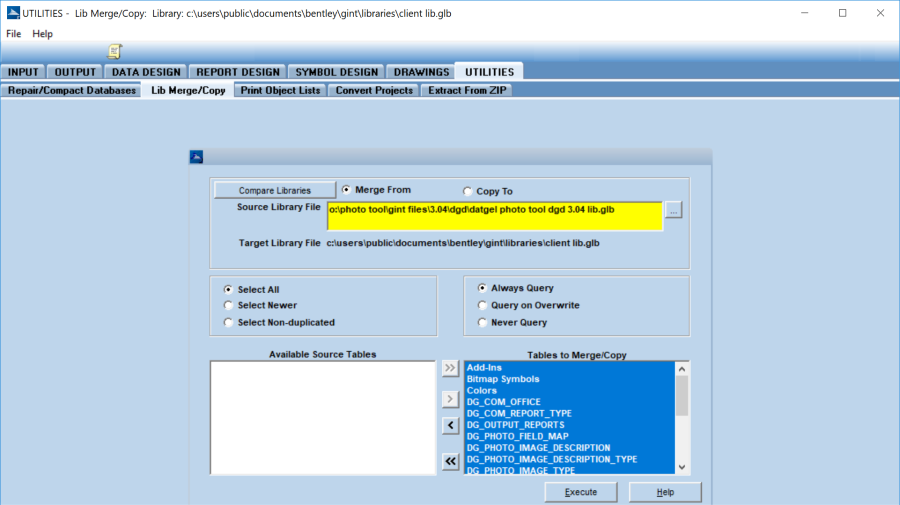
- Check the bullet that reads Merge from.
- In the Source Library File pane, browse to the gINT Files folder (that you previously copied from the downloaded .zip folder to your Desktop) for the file Datgel Photo tool DGD #.## lib.glb where ## is the version number.
- Check the bullet that reads Select All.
- Check the bullet that reads Query on Overwrite.
- Click
 button to move all tables from the Available Source Tables pane on the left to the Tables to Merge/Copy pane on the right side.
 - Click Execute.
Take care to read the overwrite dialog and click Yes if you wish to overwrite the file, ELSE click No.
This will merge in the Add-In menu item, Image Type lookup list, gINT Rules modules, graphic tables, log reports and user system data, which are all related to the Tool. - Click OK to finish the merge.

Merge gINT Project Tables and Fields
- Make a backup copy of your existing project file. By default this is located in: C:\Users\Public\Documents\Bentley\gINTCL\Projects\
- Start gINT and open the library and project file you wish to use with Datgel Photo Tool.
- Select DATA DESIGN | Project Database.
- Select File > Open File > Current Project… to open your current project file.
- Select Tables >Import Multiples Tables... then browse to the gINT Files folder (that you previously copied from the .zip file) and select the file Datgel Photo Tool DGD #.##.gpj where #.## is the version number.
Click Open.
Merge the tables IMAGE, IMAGE_DESCRIPTION and PROJECT_OPTIONS.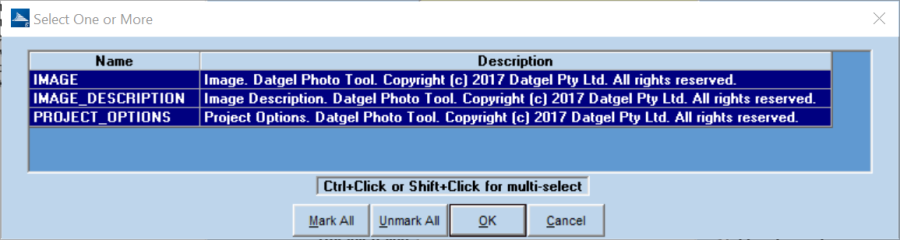
- If and PROJECT_OPTIONS exists, then Select Tables >Merge Fields from Other File... then browse to the gINT Files folder (that you previously copied from the zip file) and select the file Datgel Photo Tool DGD ##.#.gpj. Select the PROJECT_OPTIONS table, and select all fields.
- Similar to step 6, merge PROJECT.Office and POINT.Visual_Column.
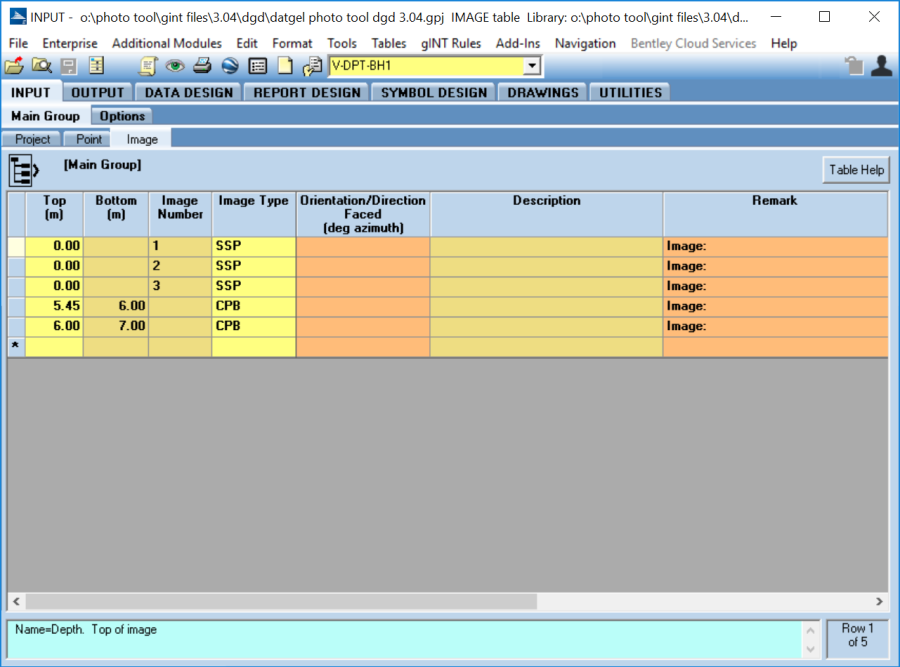
- Select INPUT | Main Group to review the new IMAGE and the order appears in gINT INPUT can be changed in the Tables > Input Sequence… menu option.
- In the Options | IMAGE_DESCRIPTION table is empty, import data from Datgel Photo Tool DGD ##.#.gpj for this table only.
- Select Tools > Make Data Template to either create a new data template, or write over an existing one to ensure your data template has the new table. Click Save.
- Once you have completed the above steps you can now delete the gINT Files folder that you previously copied onto your Desktop.
Configuring Logos in the Library
Import a new raster file
Logos images are managed from SYMBOL DESIGN | Bitmap Symbols. You can store many different logos here, each having its own page. Non logo images can also be stored here.
Make a new Bitmap Symbol
- Create a new page

- Enter the Name and Description.
- Using the Load Raster File browser, select the file you wish to import, and click OK.
Replace existing Bitmap Symbol with a new image
- Select the item from the object selector list
- Open Page Properties

- Using the Load Raster File, browser, select the file you wish to import, and click OK.
How to add a new Office
- If required, import the raster file as described in section Import a new raster file.
- Navigate to DATA DESIGN | Library Data, and open table DG_COM_OFFICE.
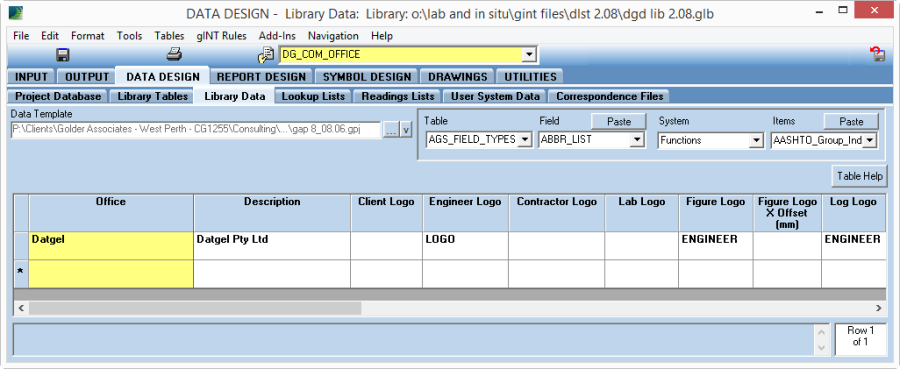
DG_COM_OFFICE - Make a new record and update the Office, Engineer_Logo, Figure_Logo, and Figure_Logo_X_Offset fields.
- Return to INPUT, and on the Project table select new item in the Office field. If you prefer to use the new office for your projects, set it as the field default, and make a new data template.
- Move to OUTPUT, and test that log and graph reports present the logo as desired. You might need to adjust the value for Figure_Logo_X_Offset to present the logo cantered in the figure title block box. Keep in mind that by default the logo will be offset by 2 mm.