Lab Data Entry
Overview
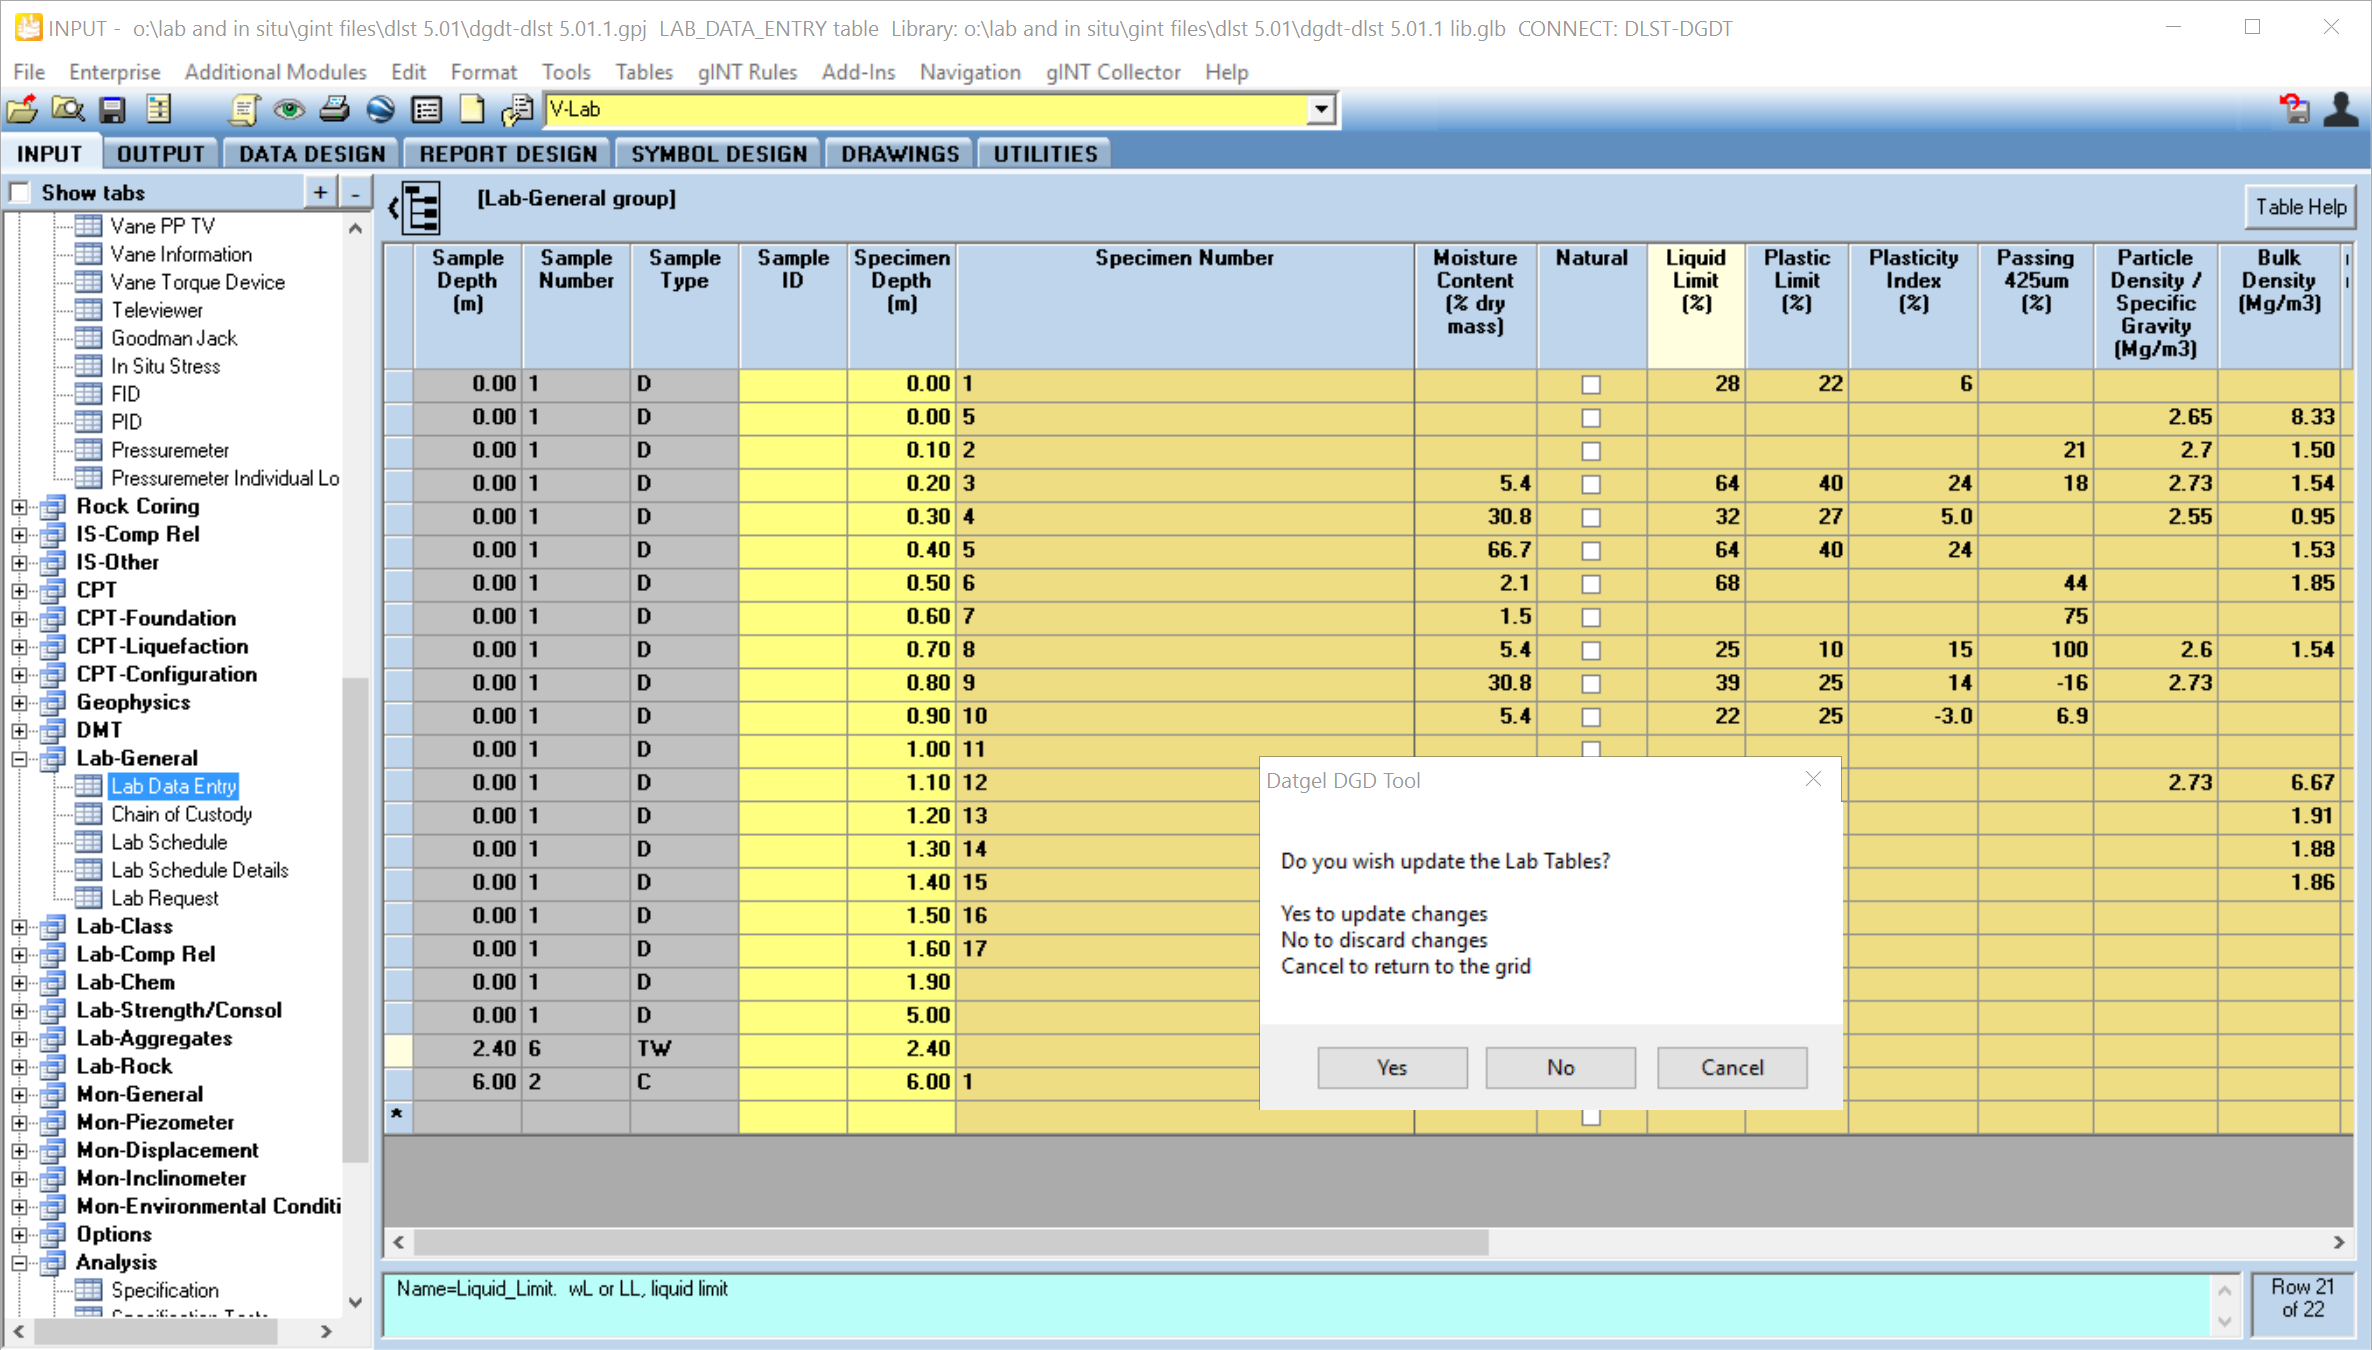
The Lab Data Entry feature enables you to efficiently enter and edit multiple simple lab results in one table interface. This applies for lab test results stored in tables that are a one to one child of SPECIMEN.
Use
The procedure is as follows:
- Navigate to INPUT | Lab-General | Lab Data Entry.
- Select the desired PointID.
- Select, Add-Ins > Datgel DGD Tool > Pre-populate Lab Data Entry Table. This causes all existing lab data within the scope of the table to display.
- You can now:
- Enter/edit data on existing records. On the existing rows, you can add data, and modify or delete existing data.
- Create new records and enter data. Select a Sample and enter a value for Specimen_Depth and optionally Specimen_Number.
- Delete a record by checking the delete check box.
- When the table saves, a message box displays and you can choose from the options to update, discard, or return to the grid continue editing.
Lab Data Entry form
Configuration
The configuration of this feature is stored in the library table DG_LAB_DATA_ENTRY_CONFIGURATION. To add additional test results, add a field to LAB_DATA_ENTRY, and then add a corresponding record to DG_LAB_DATA_ENTRY_CONFIGURATION.
On this page
