Manage Logos on Reports
Configuring Logos in the Library
Import a new raster file
Logos images are managed from SYMBOL DESIGN | Bitmap Symbols. You can store many different logos here, each having its own page. Non logo images can also be stored here.
Make a new Bitmap Symbol
- Create a new page

- Enter the Name and Description.
- Using the Load Raster File browser, select the file you wish to import, and click OK.
Replace existing Bitmap Symbol with a new image
- Select the item from the object selector list
- Open Page Properties

- Using the Load Raster File, browser, select the file you wish to import, and click OK.
How to add a new Office
- If required, import the raster file as described in section Import a new raster file.
- Navigate to DATA DESIGN | Library Data, and open table DG_COM_OFFICE.
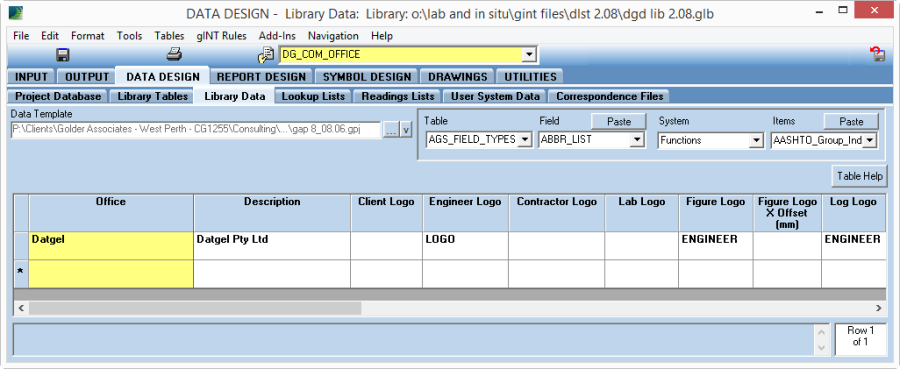
DG_COM_OFFICE - Make a new record and update the Office, Engineer_Logo, Figure_Logo, and Figure_Logo_X_Offset fields.
- Return to INPUT, and on the Project table select new item in the Office field. If you prefer to use the new office for your projects, set it as the field default, and make a new data template.
- Move to OUTPUT, and test that log and graph reports present the logo as desired. You might need to adjust the value for Figure_Logo_X_Offset to present the logo cantered in the figure title block box. Keep in mind that by default the logo will be offset by 2 mm.
On this page