AGS Support
Overview
The DGDT supports the import and export of a range of AGS Format versions, including: AGS 3.1, AGS 3.1 RTA 1.1, AGS 3.1(SG), AGS 4.0.4, AGS 4.0.4 NZ, AGS 4.0.4+ (Orsted), AGS 4.1.1 and AGS 4.1.1 AU 1.2.
gINT allows AGS import, export, checking and editing in excel and text editors. All of these functions can be accessed from within the Input application.
AGS File Commands are located in INPUT | File > AGS Files.
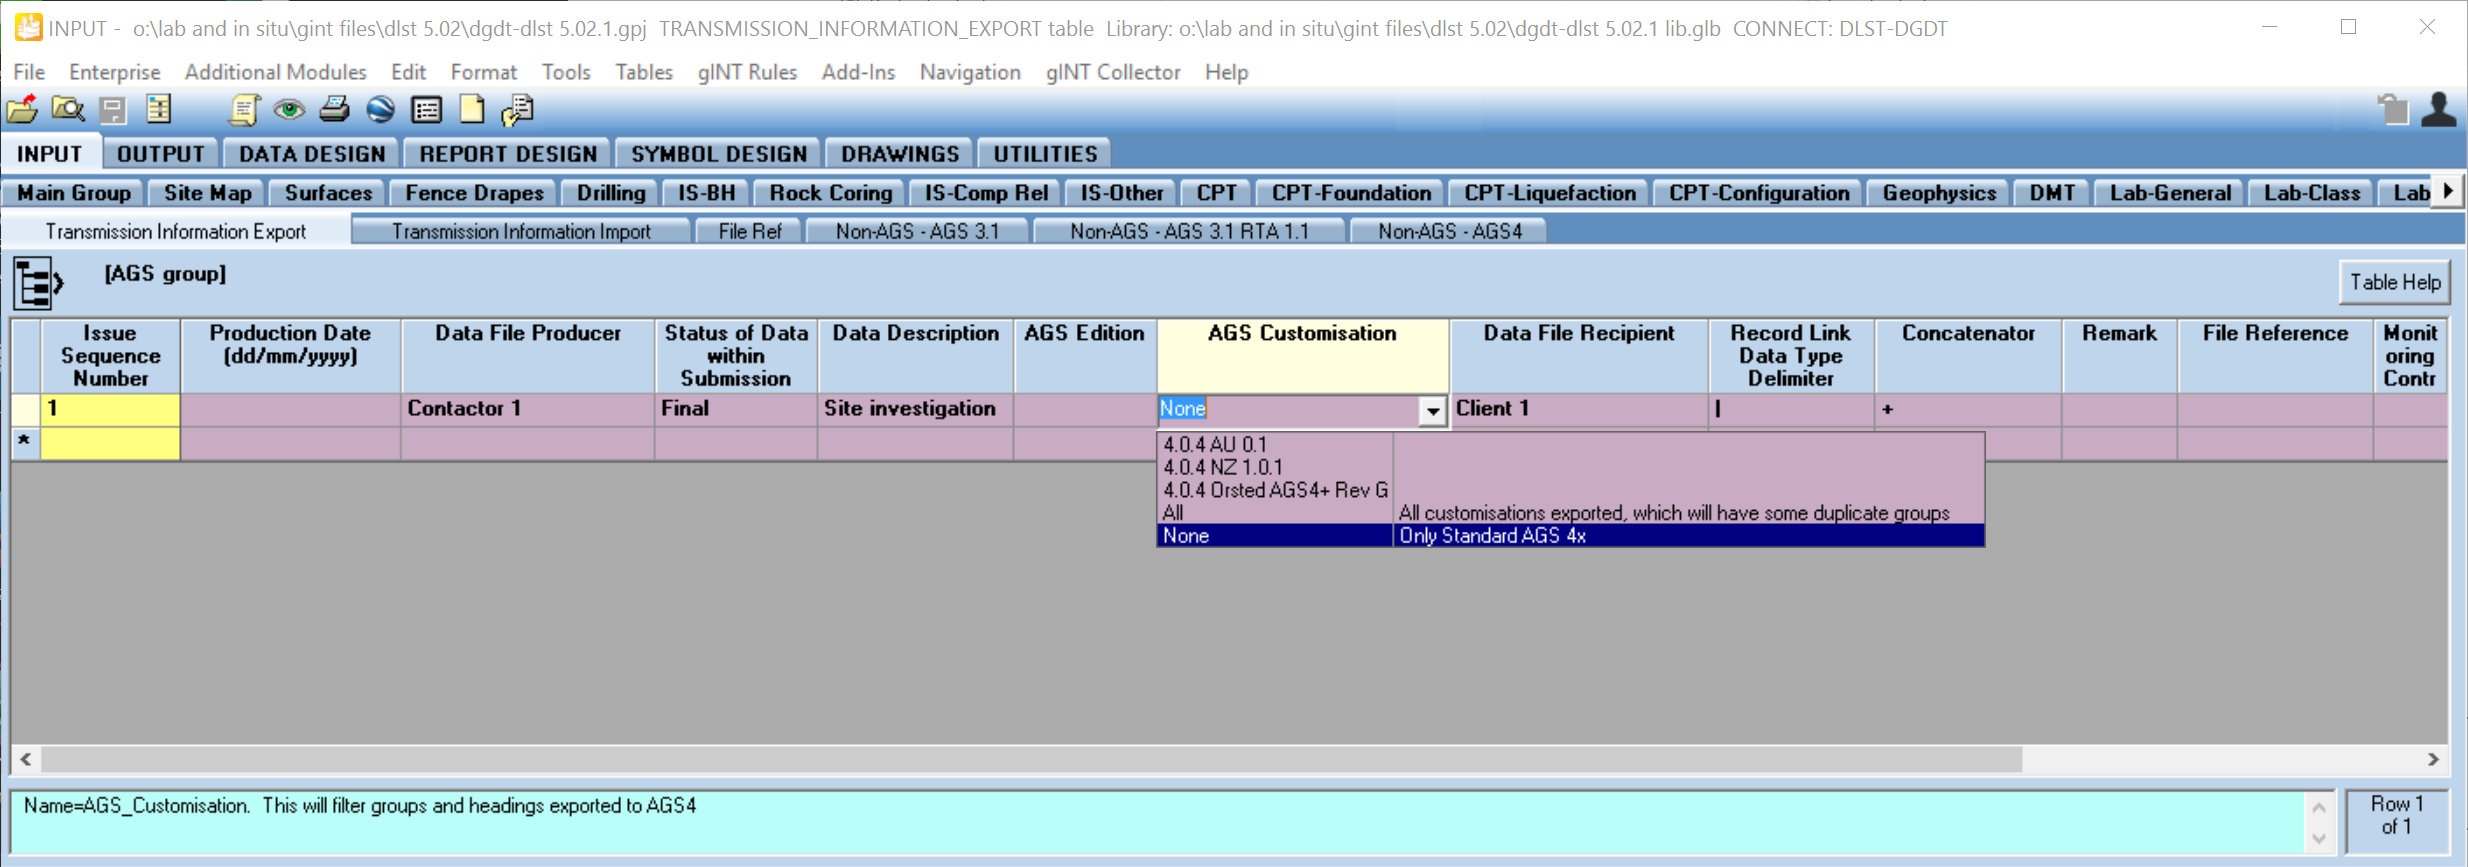
Before exporting to AGS the field AGS_Edition, found on the Transmission_Information_Export table, may be set. Refer to table AGS Edition Value. In version 5 the export correspondence file has a default value for this.
If you are exporting AGS 4, then also set the AGS Customisation field. Don't use All, as that will generate data you don't want in practice.
AGS Edition Value
Version | Value to Enter in AGS Edition | |
|---|---|---|
AGS 3.1 | 3.1 | |
AGS 3.1 RTA 1.1 | 3.1 RTA 1.1 | |
AGS 3.1(SG) | 3.1(SG) | |
AGS 4.0.4 | 4.0 | |
AGS 4.0.4 NZ | 4.0.4 NZ v1.0.1 | |
| AGS 4.0.4+ (Orsted) | 4.0 | Set TRAN_REM to state ’AGS4+ Rev G’ |
| AGS 4.1.1 | 4.1.1 | |
| AGS 4.1.1 AU 1.2 | AGS 4.1.1 AU 1.2 |
Importing AGS Data
In Input, select File > AGS File > Import from AGS File and the following dialog appears:

Import from AGS File
- Select the AGS File to import.
- Browse to the relevant Correspondence File for the version of AGS you need to import.
- For AGS 3.1: ags 3.1 to dtb #.## ##.gci
- For AGS 3.1 RTA 1.1: ags 3.1 rta 1.1 to dtb #.## ##.gci
- For AGS 4: ags 4.0.4 std+au+nz+orsted to dtb #.## ##.gci
- For AGS 4.1.1: ags 4.1.1 + ags 4.1.1 au 1.2 to dtb #.## ##.gci
The gINT program remembers the correspondence file between sessions so once you have specified one, you will never have to specify it again, as long as you use the same file.
- Configure the Overwrite Option, normally Never is appropriate. If you are importing to a new project, the Overwrite Option doesn't matter: there is nothing to overwrite. If you are importing to a project that already has data, the choice of the Overwrite Option can be very important. Refer to the gINT Online Help Overwrite Options section for an explanation.
- If you have not previously checked the AGS file, it is a good idea to do so before import, to do so check the box.
- Click OK.
- If you checked the AGS file, on the checker form, click View Report, and name a file to save it as. The checker report will now display in a text editor. FYI are not generally a concern. If there are errors, you could send the file to the data generator and request they correct the problems. If you wish to proceed with the import, click OK on the form now visible in gINT.
See section AGS Checker below for details on the Check file before import option. - Review the import log for problems, click OK. You may like to save this to a text file for future reference.
- Review the data imported. Look for data completeness and correct units etc.
Exporting AGS Data
To export your data to an AGS file, select the File > AGS Files > Export to AGS File menu item in the Input application. That will export the currently active project. The following dialog appears:
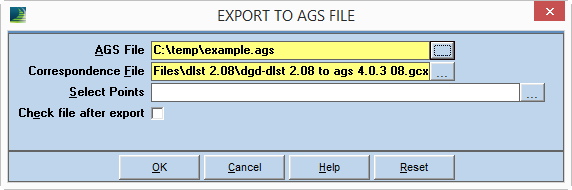
Export to AGS File
- Set the AGS File to make.
- Browse to the relevant Correspondence File for the version of AGS you need to export.
- For AGS 3.1: dgdt-dlst 5.## to ags 3.1 ##.gcx
- For AGS 3.1 RTA 1.1: dgdt-dlst 5.## to ags 3.1 rta 1.1 ##.gcx
- For AGS 4: dgdt-dlst 5.## to ags 4.0.4 ##.gcx
- For AGS 4 without any customization: dtb #.## to ags 4.0.4 01.gcx
- For AGS 4 with customization: dtb #.## to ags 4.0.4 std+au+nz+orsted 02.gcx
- For AGS 4.1 without any customization: dtb 6.01 to ags 4.1.1 05.gcx
- For AGS 4.1 AU 1.2: dtb 6.01 to ags 4.1.1 au 1.2 06.gcx
The gINT program will remember the selected correspondence file between sessions.
- Select PointIDs or leave it blank for all, and click OK.
- Review the export log for problems, save the text log file for future reference, click OK.
- On the checker form, click View Report, and name a file to save it as. The checker report will now display in a text editor.
FYI are not generally a concern, if you find errors you should investigate the issue, and if needed contact Datgel for advice. - Open the AGS file in a text editor (such as Notepad++) and review the data and file layout.
AGS 4.0.4+ (Orsted) requires multiple AGS format files to be created for a project, each with a different set of groups. We have provided a complete gcx, and the sub set gcx files suffixed with _AdvLab, _Chem, _CPT, _InSitu and _Lab. The script file dtb #.## to ags 4.0.4 ##.gsc will export these subset files in one process, but you may need to edit the file paths in a text editor.
AGS Checker
The gINT Checker is no longer being maintained by Bentley Systems, but it is the only checker for AGS 3.1 and AGS 3.1 RTA 1.1. For AGS 4 or later, we recommend the AGS Validator is used, available from https://www.ags.org.uk/data-format/ags-validator/
Also refer to Procedure for Checking AGS Format Data.
Editing AGS Files
Ideally AGS data exported from gINT should require no further editing. These tools are provided for the odd occasions where editing after export is the easiest way to correct a problem.
Editing in Excel®
In the Input application, select File > AGS Files > Edit AGS File in Excel…. This option is not available if you do not have Excel installed. On invoking the command, the following dialog appears:
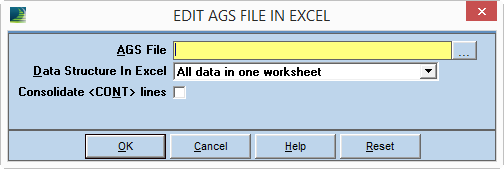
Edit AGS Files in Excel
Select the desired AGS file in the first field.
The Data Structure in Excel field has the following choices:
- All data in one worksheet
- Each dataset in a separate worksheet
With the second option, each AGS group is placed on its own worksheet in the spreadsheet file with the worksheet named by the AGS group.
If the Consolidate <CONT> lines check box is marked, continued heading, units, and data lines are combined into one line so that there are no continuations. With AGS4 and newer <CONT> is no longer used.
If you wish to view lines in the file where errors were pointed out in the AGS File Checker set, use the following configuration:
- Set Data Structure In Excel to All data in one worksheet
- Do not mark Consolidate <CONT> lines
With this configuration the worksheet will match the line numbers given in the AGS File Checker log. However, the program will not recreate the AGS file from any edits you make in this mode. For edits in Excel to be saved, the Consolidate <CONT> lines property must be marked.
If you wish to actually edit the file in Excel, you must mark the Consolidate <CONT> lines property. The program will not recreate the AGS from the Excel spreadsheet without this property being marked. To support editing, it is also better to select Each dataset in a separate worksheet for the Data Structure in Excel property. This makes finding data and adding new rows much easier.
You cannot access gINT while editing the spreadsheet.
If you have marked the Consolidate <CONT> lines property, make changes in Excel and save the file. gINT then recreates the original AGS file based on the new data. Quotes will be put around all data cells and lines broken appropriately to satisfy the 240 character limit imposed by the AGS standard.
If you do select the Each dataset in a separate worksheet option, you may find some worksheet tabs with some strange-looking names. For example, Excel does not allow the ? character, but it is a required group prefix for tables not in the AGS specification. The program translates ? to %%d, so a worksheet tab may read %%dABCD. If the AGS file is recreated from the spreadsheet, the program will translate these codes back to their original characters.
Editing in a Text Editor
In the Input application, select File > AGS Files > Edit AGS File in Text Editor. A standard Windows file open dialog displays. Select the desired file and click the Open button. gINT will launch the default Windows text editor (e.g. Notepad or WordPad, depending on operating system). Make whatever edits you wish.
Notepad++ is a freeware text editor available from http://notepad-plus-plus.org/. Its enhanced features make it easier to view and edit AGS files.