Setup entitlement group and assign products
You have two ways by which you can control your gINT product usage.
As a Site Administrator or Co-Admin, you can block your Country site users from using a particular product(s) following the steps below. An example of this scenario is where you hold gINT Logs license and you want to ensure that no users in your entitlement country will accidentally use gINT Professional or gINT Professional Plus and cause QTL charge.
- Login to https://connect-entitlementmanagement.bentley.com
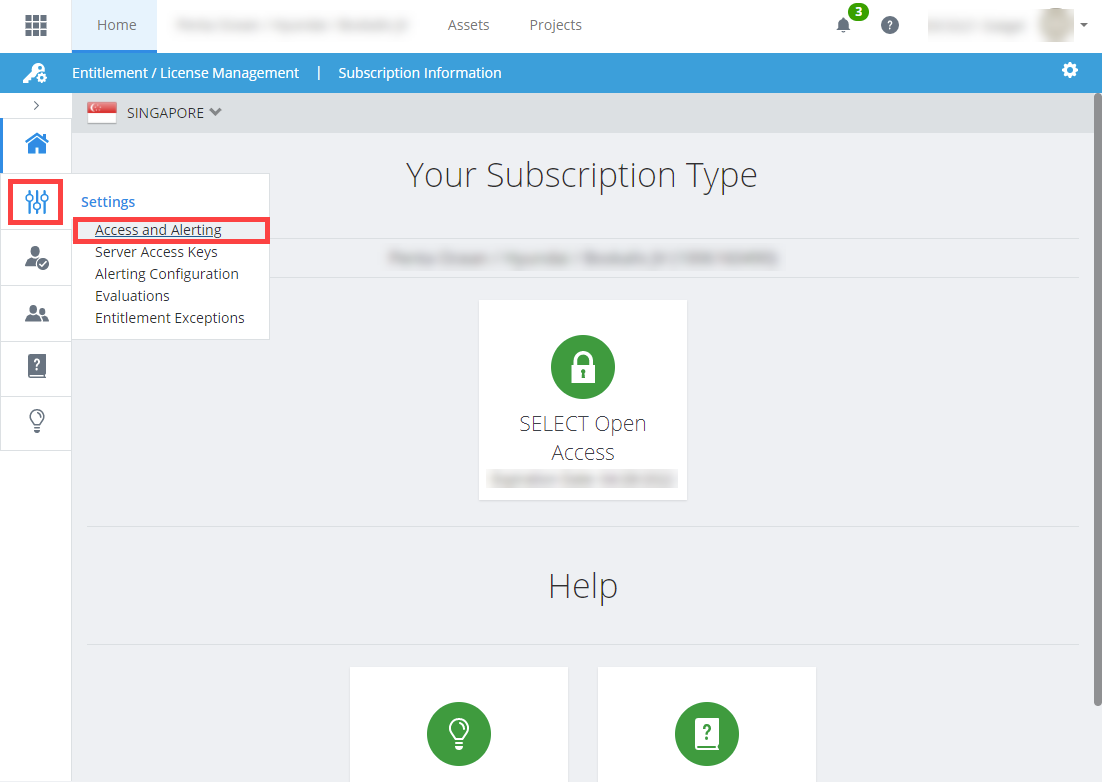
- Click on the Settings button on the left-side Menu, and select Access and Alerting.
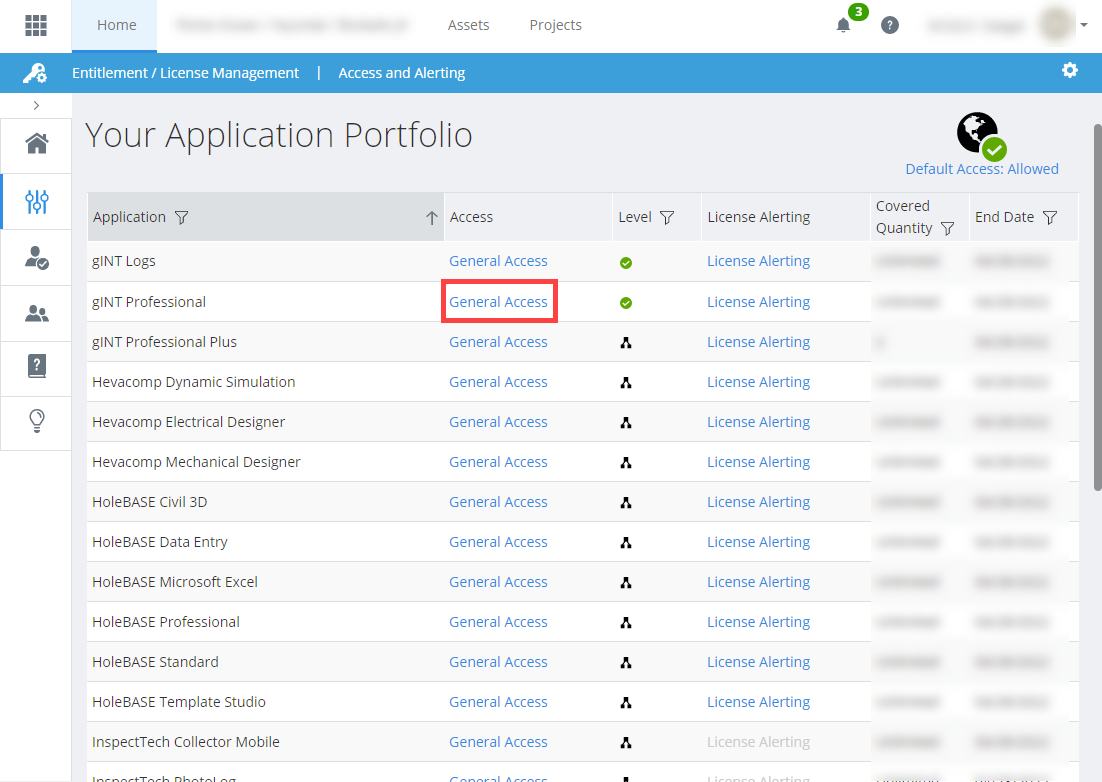
- On the list of applications, filter / look for the product that you want to deny access from.
- Click General Access for that product. In this example, we want to deny access from gINT Professional.
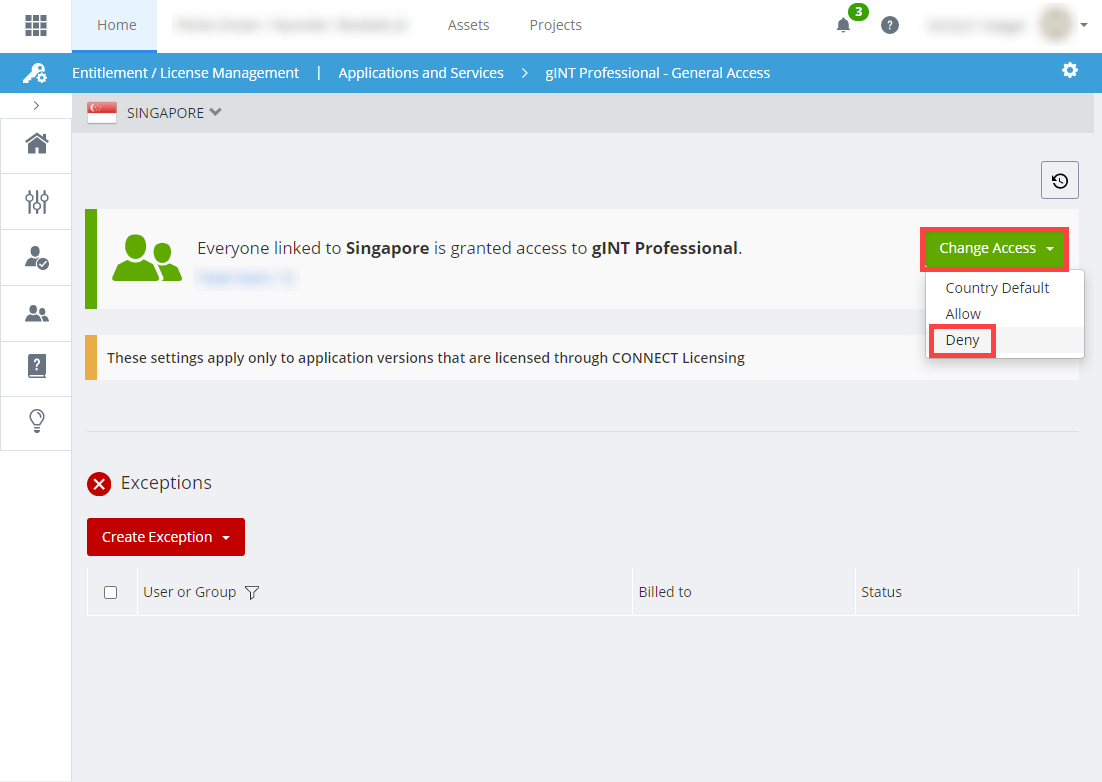
- Click Change Access button and select Deny option.
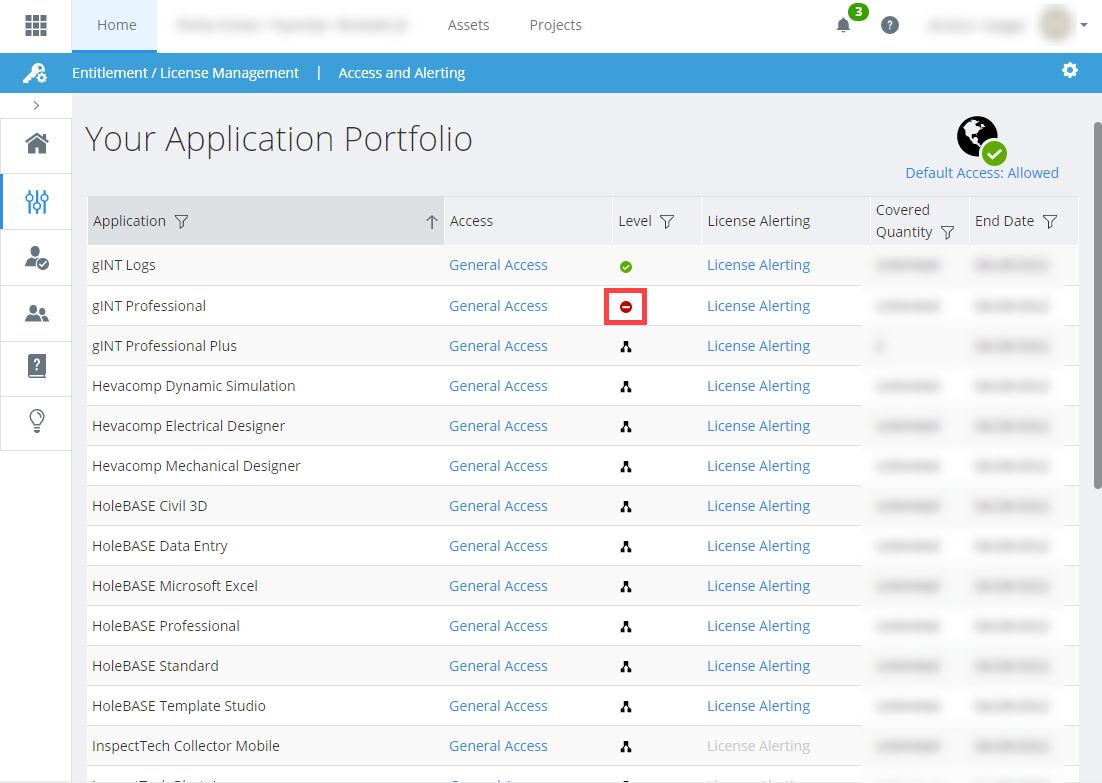
- Once this is set, you should see that the product is now blocked in the list of applications.
The aim of setting up Entitlement groups is to control the gINT product level used and you can also assign different users to different groups with different product restrictions.
- Launch and login onto the Bentley Connect User Management page: https://usermanagement.bentley.com/
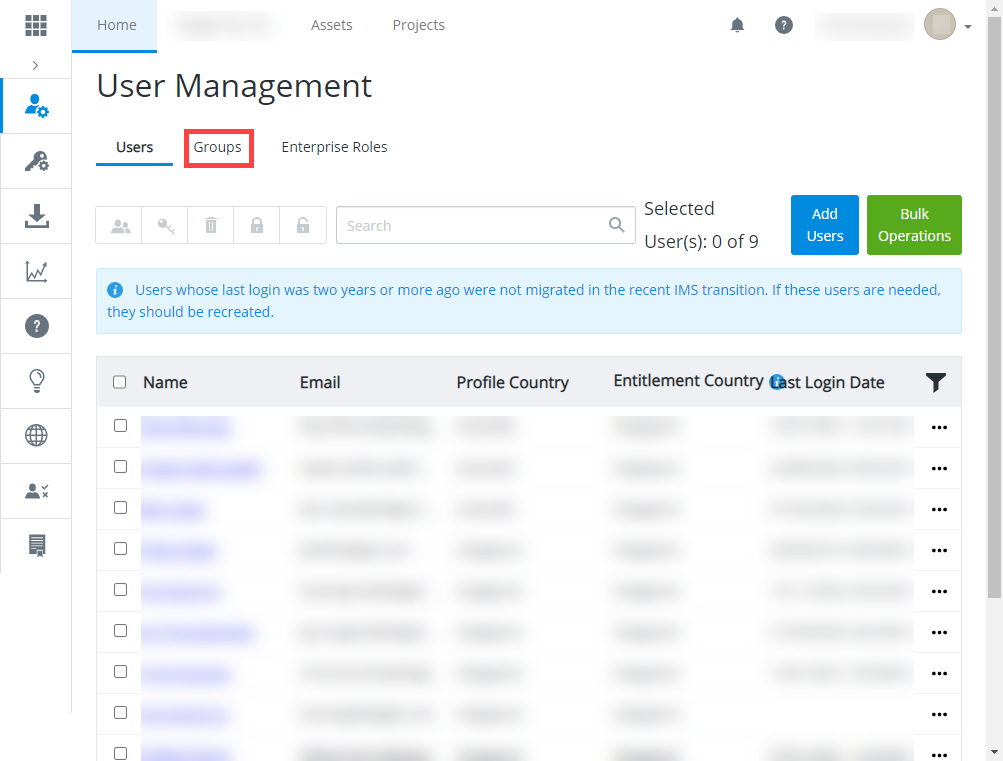
- After a successful login, you will be directed to the following screen.
- Click on the Groups button.
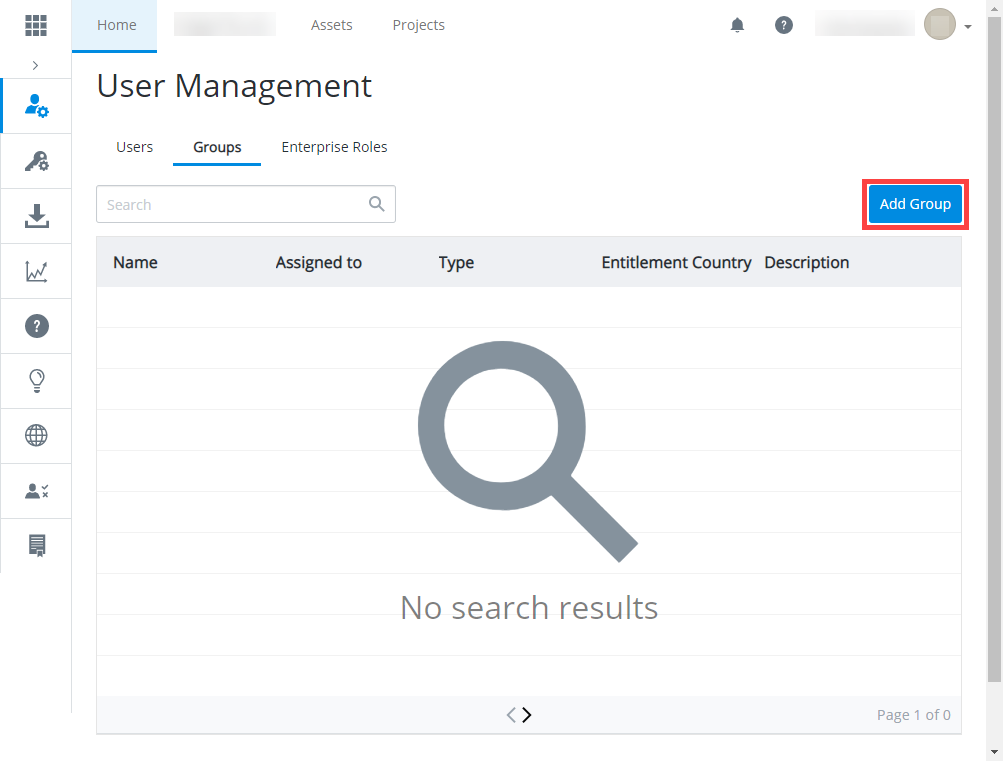
- Click on Add Group button.
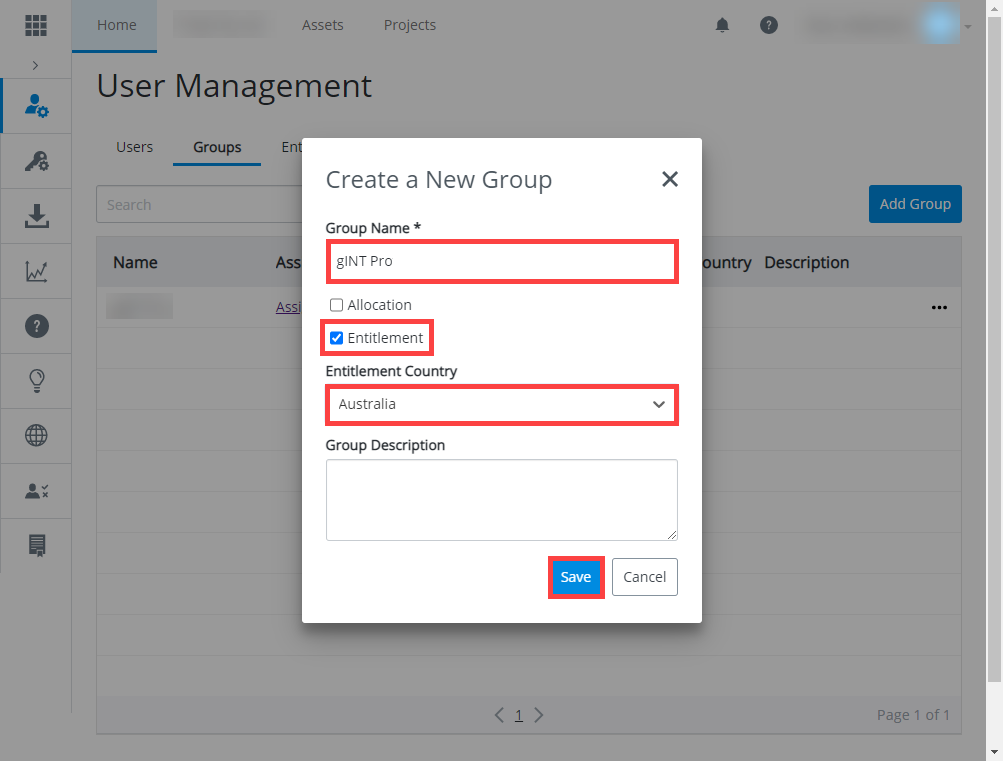
- Type in the required details:
- Assign a Group Name. Best to assign logical names, e.g. gINT Pro, gINT Logs+Pro
Examples:- If you only have gINT Pro, set a group named gINT Pro.
- If you only have gINT Logs, set a group named gINT Logs.
- If you have gINT Logs and gINT Pro, you can set a group named gINT Logs, a group named gINT Pro, or a combined group named gINT Logs + Pro depending on your need.
- Select the Entitlement checkbox.
- Choose the country, add group description and click Save.
- Assign a Group Name. Best to assign logical names, e.g. gINT Pro, gINT Logs+Pro
- Click on the Groups button.
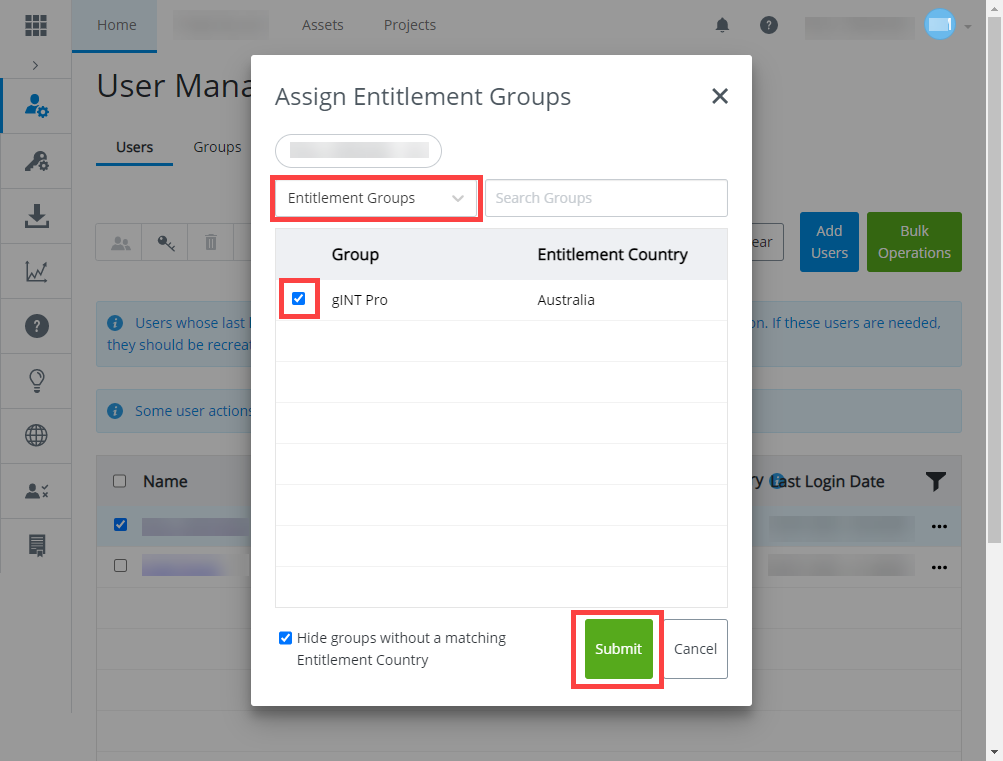
- Assign Groups to each user.
- Navigate back to the Users tab, and check the box for each user you want to include in a group.
Then click on Assign Groups icon.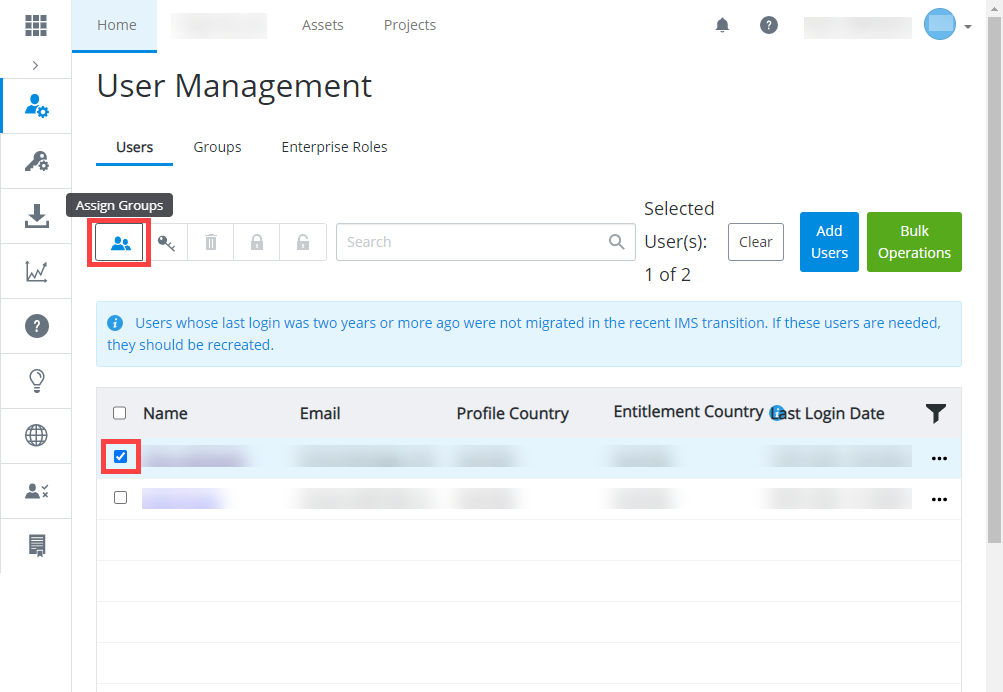
if you created a group for gINT Logs + Pro, then the user assigned to it will have access to both gINT Logs and gINT Professional. - Select Entitlement Group and check the checkbox of the desired group. Click Submit.
- Navigate back to the Users tab, and check the box for each user you want to include in a group.
- Assign Products to each Group.
- Launch and login onto the Bentley Entitlement Management page: https://connect-entitlementmanagement.bentley.com
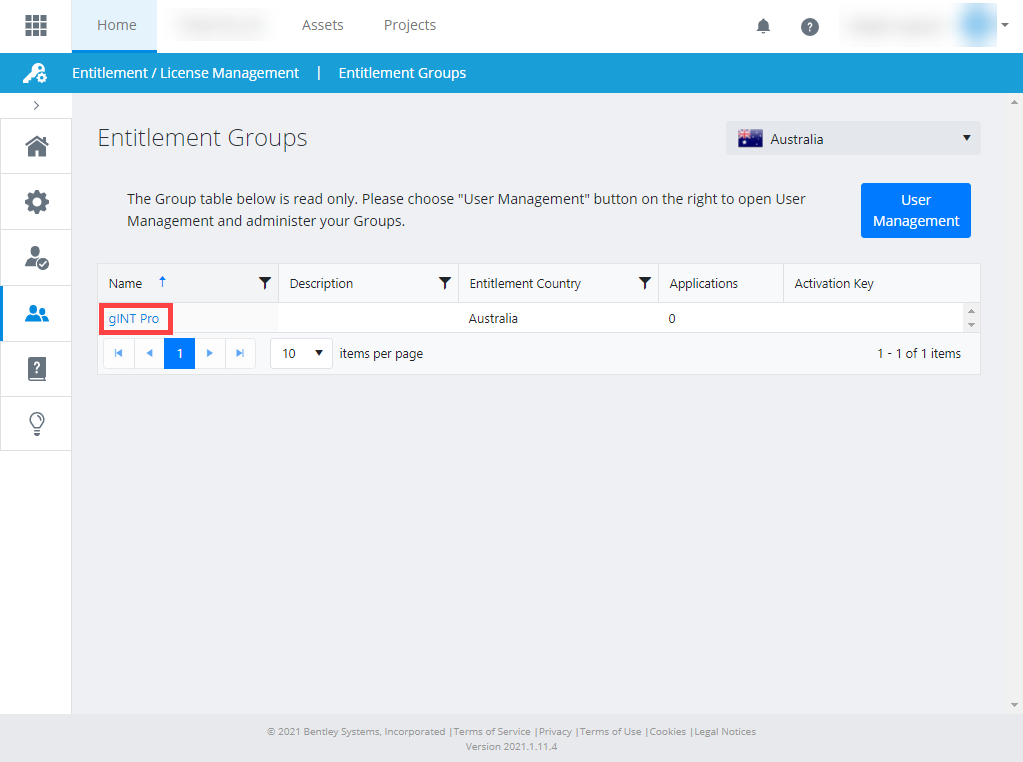
- Select Users and Groups from the left-side menu, and then select Entitlement Groups.
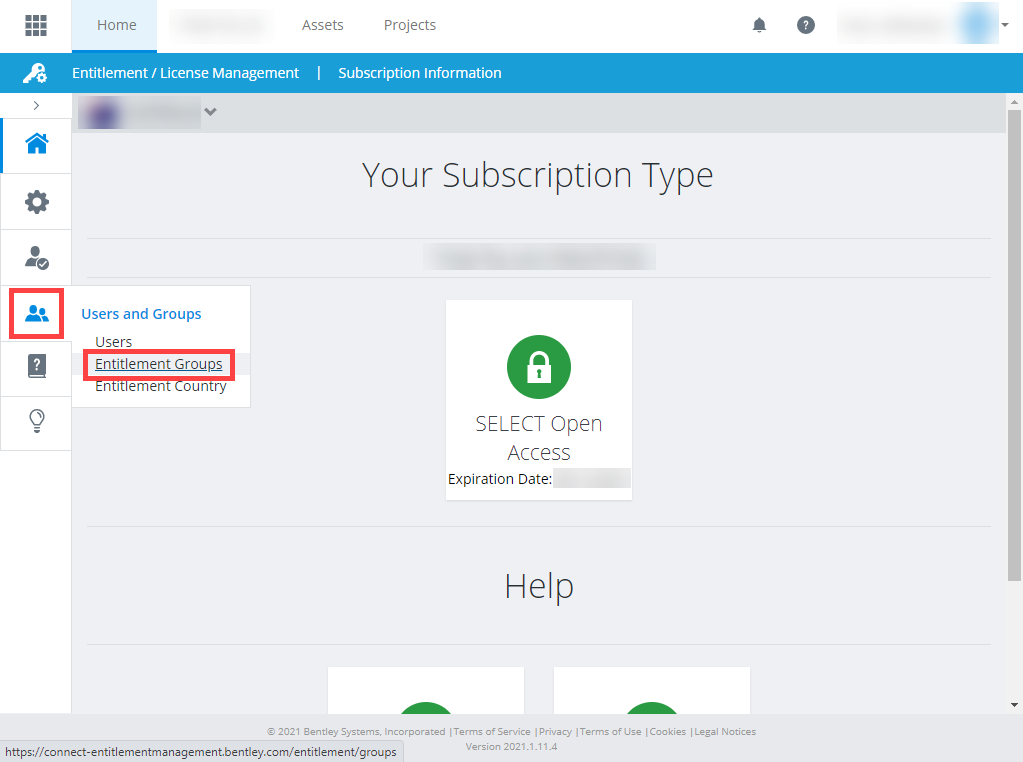
- On the Entitlement Groups dashboard, click the desired group. It may take a few minutes for this to be visible after making the group under User Management.
- In the Search field search for an application that you want this group to HAVE access to.
Select the application(s) and click on a blue plus sign.
For example:
If the group is created for gINT Logs, you need to check the gINT Logs checkbox.
If the group is created for gINT Professional users, you need to check the gINT Professional, gINT Civil Tools Professional and gINT Civil Tools Professional Plus checkboxes.
If the group is gINT Logs + Professional, then you need to check the gINT Logs, gINT Professional, gINT Civil Tools Professional and gINT Civil Tools Professional Plus checkboxes.
In this scenario, the group is created for gINT Professional users, hence we check the gINT Professional, gINT Civil Tools Professional, and gINT Civil Tools Professional Plus checkboxes.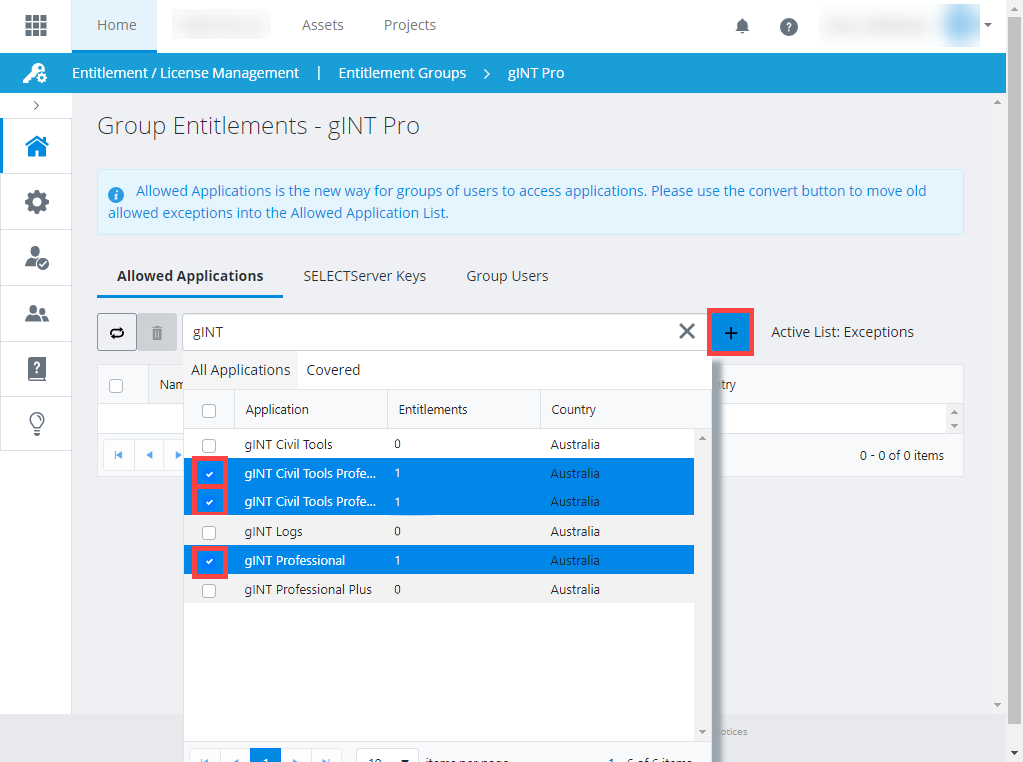
- Launch and login onto the Bentley Entitlement Management page: https://connect-entitlementmanagement.bentley.com
After configuring your product(s) access and/or setting up your entitlement groups, it is important to also set up alerts for excess usage. The purpose is to warn users real-time that the perpetual licenses are occupied and if they proceed to use gINT they will incur a QTL invoice.
- Login to https://connect-entitlementmanagement.bentley.com
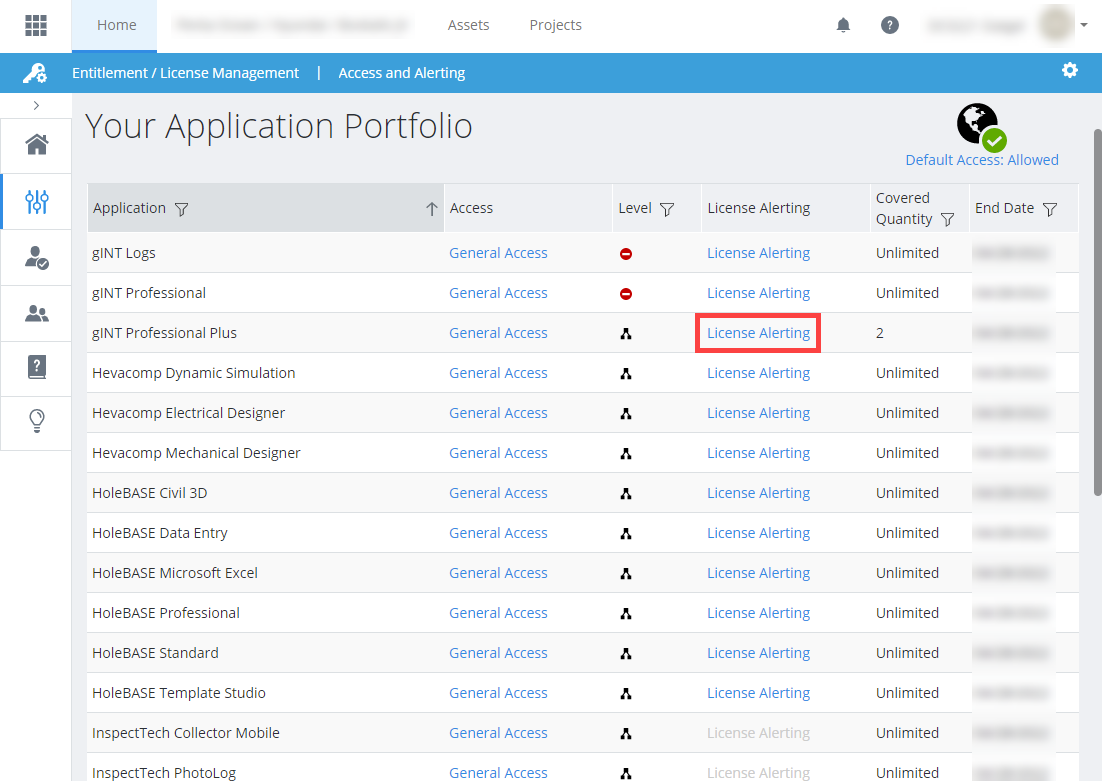
- Click on the Settings button on the left-side Menu, and select Access and Alerting.
- Click on the the relevant License Alerting. In this example, we are setting up the alert for gINT Professional Plus.
- Check the box Enable Alerts for this application.
For Offline Usage, choose the best option in your case.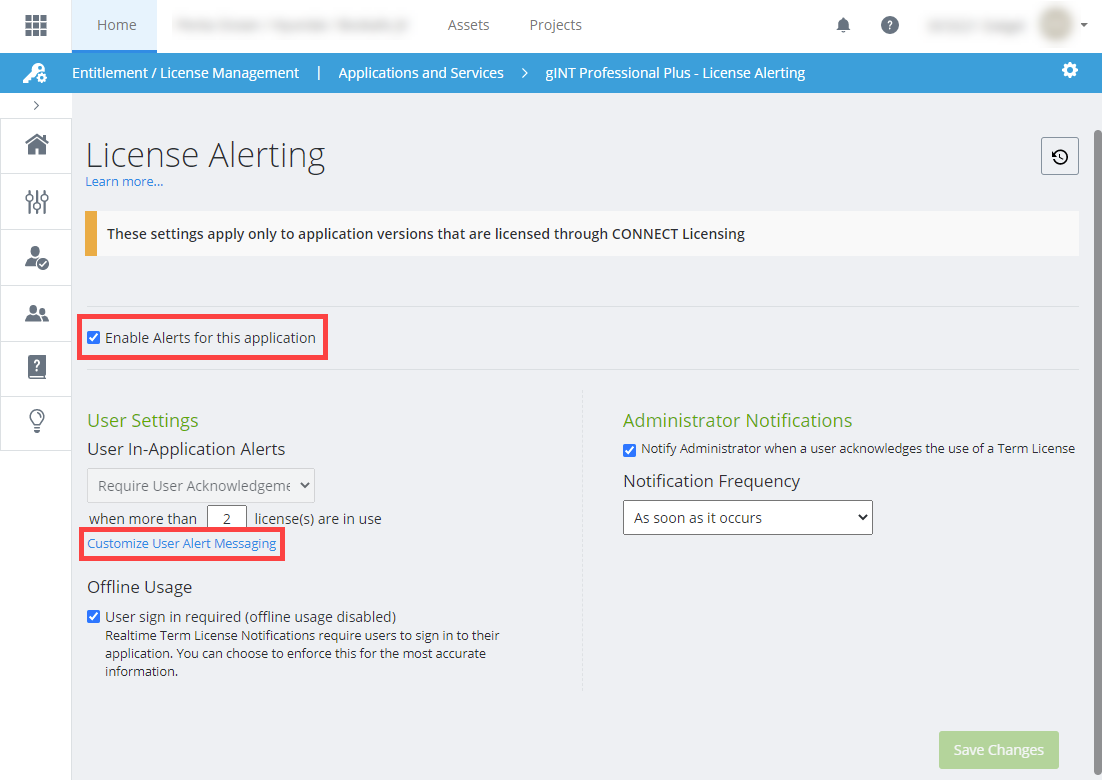
Click on Customize User Alert Messaging and write a message (scary words are best). Click OK.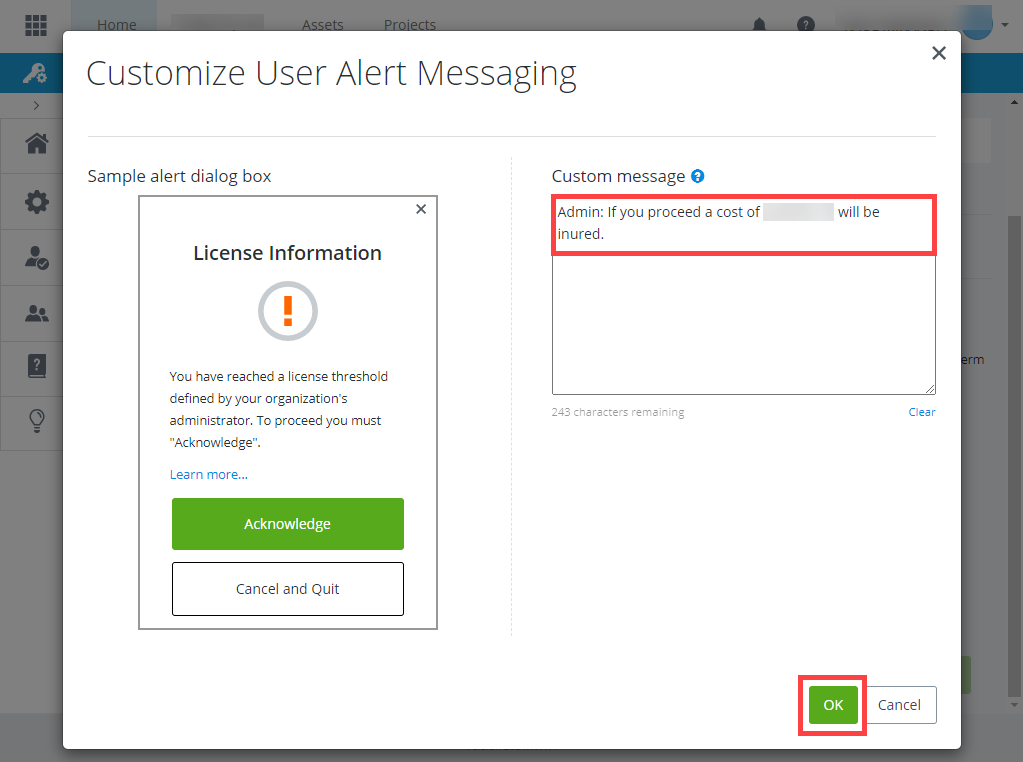
Save changes.