Quick Start Guide
Overview
This page guides you through the setup and explains basic use of the CPT Tool.
gINT Logs, Professional or Professional Plus must be installed and licensed on your computer to use the CPT Tool.
Datgel CPT Tool Installation and Licensing
The CPT Tool package can be downloaded from datgel.com.
- Full version: https://www.datgel.com/customer/downloadableproducts
- Trial version: https://www.datgel.com/trial-software
Package Content
- Documentation folder:
- Example reports
- EULA
- Links to the product and licensing online user guides
- Link to email to support.
- gINT Files folder:
Two Data base structures are available in the gINT Files folder, the DGD SI (International System Units) and the DGD EN (English Units). Each one includes:- gINT Project, gINT Library and gINT Data Template files:
- "datgel cpt tool dgd X.XX.X lib trial.glb" or "datgel cpt tool dgd X.XX.X lib.glb" (gINT library file)
- "datgel cpt tool dgd X.XX.X si.gpj" or "datgel cpt tool dgd X.XX.X en.gpj" (gINT project file)
- "datgel cpt tool dgd X.XX.X si.gdt" or "datgel cpt tool dgd X.XX.X si.gdt" (gINT data template)
- Correspondence files for import and export of data and import CPT raw data (.gci and .gcx)
- gINT Project, gINT Library and gINT Data Template files:
- Example CPT Data Files: Includes data from different CPT file formats (.dcf, .gef, geoexplorer, gorilla, etc.)
Extract the all files in the zip to a folder on your local computer.
Installation
Before Installation
A few basic preparations can help ensure an effortless installation.
- Make sure that the computer where you plan to install the program meets the minimum hardware and software requirements. Win 7 or later, with at least 4 GB of RAM.
- Connect your PC to Internet before installation (the process may need a working Internet connection).
The CPT Tool requires that the Microsoft .NET 4.8 framework is installed on the PC prior to the installation of the Tool. If your PC does not have this, then it will be automatically downloaded and installed during the Tool installation process.
- Log into the PC with Administrator privileges before starting installation.
- It is recommended that you exit out of other applications that maybe running on your PC.
- Close gINT before you start installation.
Install DLL Program
- Browse to the folder \Installation Files in the extracted ZIP.
- Double click the file named DatgelCptTool-#.#.#.#.exe.
- Click Run to begin installation. Follow on the screen instructions when installation begins:
- Click Next on the Welcome to the Datgel CPT Tool Setup dialog
- Scroll and carefully read the License Agreement, and choose option I Agree, and click Next.
Alternatively choose I Do Not Agree and click Cancel if you disagree with the license agreement. The installation will stop and exit. - On the Select Installation Folder dialog, either accept the default folder (recommended) or select Browse to specify the folder where you want to install the Datgel CPT Tool Add-In.
Leave Everyone bulleted to indicate that anyone logged onto the PC can use the Datgel CPT Tool Add-In.
Click Next when ready.
OPTIONAL Click on Disk Cost to view the disk space statistics. Click OK when done - Click Next to start installation.
- Observe the progress bar to monitor installation progress
- Click Close when the Installation Complete dialog is displayed.
Open gINT
- Start gINT
- When you open gINT if it asked for a library, then browse to the downloaded .zip folder and select the library file (.glb). Otherwise after gINT opens select File > Change Library, and browse to the aforementioned library. Note: the library is locked for the Trial version.
- Select File > Open Project. Browse to the downloaded .zip folder and select the project file (.gpj)
License Activation
Once the installation of the Datgel Tool is completed, you need to activate the license. The steps to follow are different and depend on if you are testing a Trial version or a Full Licensed version.
Validate a Single User Hardware Key
Use this procedure if you have received a Hardware Key with your license purchase.
- Make a note of the license number and serial number – you need them to complete the installation.
- The first time you open the CPT Tool library this form will show. You can access it later using select Add-Ins > Datgel CPT Tool > Licensing.
Select the option for Use a hardware key license.
Click Next. Select the option for I have an active hardware key and need to enter or update the license number, serial number [or server name].
Click Next.- Select the Contact Details tab and enter relevant information.
- Select the License Details tab and enter relevant details in the Single User Hardware Key area.
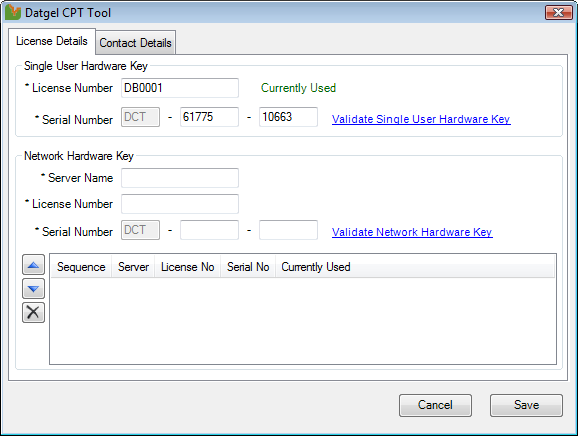
- Click Validate Single User Hardware Key.
- Click Close.
If the license is not validated successfully, check the following:- Serial Number and License Number has been entered correctly
- The Hardware Key is attached to your PC and is the correct key for this product
- On the Datgel Tool dialog, click Save.
- Click Close.
If you need to validate a Network Key License refer to License Administration.
If you are converting from a software licence to a Single User Hardware Key License, you must deactivate the Software Key License first (refer to Deactivate a Single User Software Key License).
Using the tool
Review existing example data
The gINT files included in the package contain some example data that covers all type of calculations and reports included in the Tool. You may review this data, change parameters and options and recalculate to see the changes. Also, the next sections include a detailed explanation about import, process and print a report.
This tutorial uses Datgel's standard DGD SI CPT Tool gINT Files, located on the downloaded .zip folder in folder gINT Files\DGD SI\.
Create a new Project
- Open the datgel cpt tool dgd lib X.XX.glb, using File > Change Library.
- Create a new project, select the command INPUT | File > New Project > Clone Data Template..., and select the datgel cpt tool dgd X.XX SI.gdt file, and click Open. Then provide the name Tutorial 1.gpj and click Save.
Importing CPT and Dissipation Data
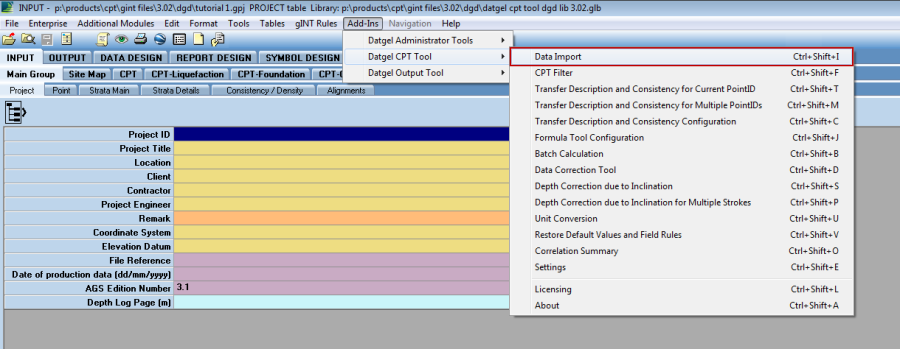
- Launch the Data Import Tool, by selecting Add-Ins > Datgel CPT Tool > Data Import.
The CPT Tool splash screen should display, confirming you are now using the CPT Tool license.- If you're using a trial license, then a form displays how many uses you have remaining.
- If nothing happens, then confirm you have installed the CPT Tool program by running the setup.exe file located in the Installation Files folder on the .zip folder.
- If you haven't previously validated your license, i.e. by entering the serial number, license number, contact details, and server name in the case of a network license. Then you will be prompted to do so now, and you should refer to Validate the License.
You should now see the Data Import Tool form.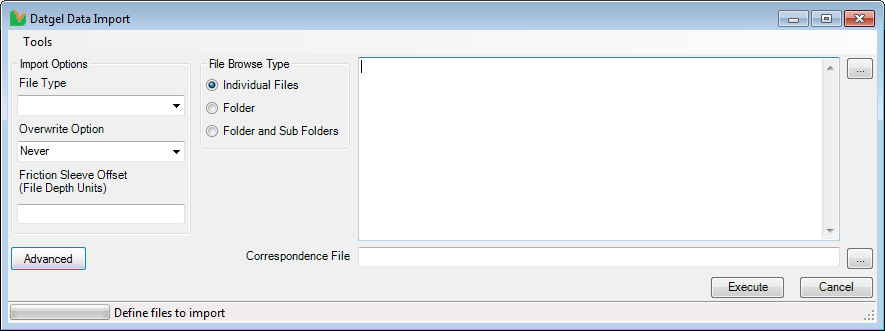
- In this tutorial we will import GEF files.
- Set File Type to GEF 1.1.0 (*.gef)
- Set Overwrite Option to Never
- Set Correspondence File to …\datgel_cpt_tool_dgd_si_X.XX_gef_##.gci. The gci can be found in the gINT Files\DGD SI\ folder on the downloaded .zip folder. The gci file translates the data during the import process between a temporary CSV file created by the CPT Tool code and the DGD database tables and fields.
- Select the Browse… button in the top right of the form, and browse to the \Example CPT Data Files\ folder from the downloaded .zip folder. Select: "GEF_01.GEF" "GEF_01_D01.GEF" "GEF_01_D02.GEF". The D files are dissipation test files related to the GEF_01.GEF file. The form should now look similar to the screenshot (apart from the folder paths).
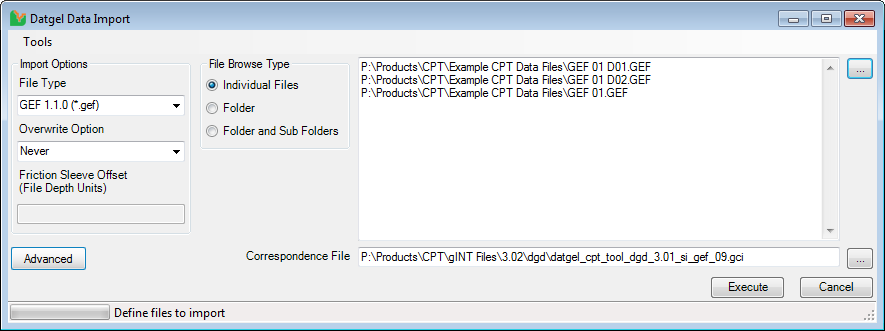
- Click Execute. There will be a short pause while the Datgel code translates the data, then you will see a gINT progress form.
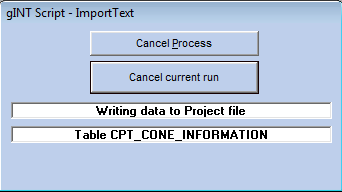
Finally, when the import is complete a gINT Import Log form will display.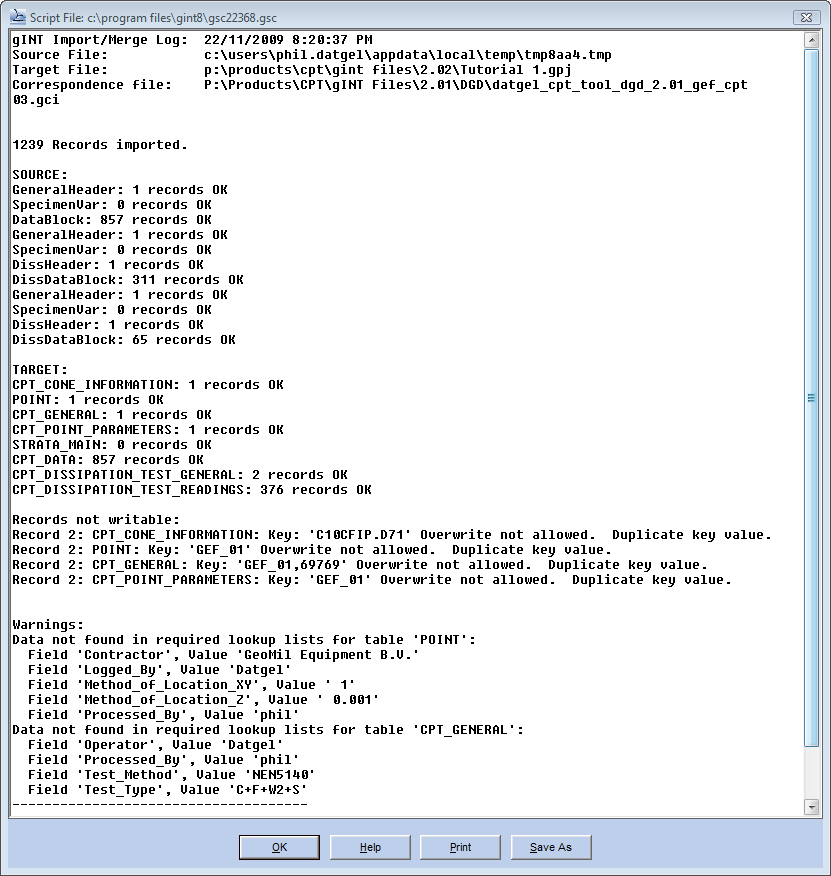
It can be useful to review the Source and Target record counts to confirm the data has imported. The Log also lists overwrite and lookup warnings. In this case the warnings are of little consequence.
You may now like to step through the tables in the project file, and observe the imported data. Note that some values, such as those on the Project_Parameters table are default values stored in the data template file that was used to make the new project.
Configuring Parameters and CPT Data Analysis
The following information must be entered for the basic CPT Calculations to occur:
- CPT | CPT_Data - Upper: Test Number, Cone ID, and (optionally) Groundwater Depth. Set Groundwater Depth to 1.
- CPT | CPT_Data - Lower: Depth, qc, fs, u2 (for CPTu)
- CPT | Cone_Information: Cone ID, Cone Area Ratio (for CPTu), Cone Sleeve Offset (used to filter rod change noise for f_s), and Cone Diameter (used by dissipation test analysis)
- CPT-Configuration | Point_Parameters: (optionally) Groundwater Depth
- CPT-Configuration | Project_Parameters: Most fields should be set, and these will be used as default values. In particular to enable basic calculations you should define:
- Bulk_Unit_Weight, default is 17 kN/m3
- Bulk_Unit_Weight_Saturated, default is 18 kN/m3
- Soil_Class_Method_1, change to Robertson 1990 Extrapolated
- Soil_Class_Method_2, leave default
Refer to section Groundwater and Overwater Testing for a detailed explanation of where to set groundwater data.
When you change the value of related fields the CPT Tool table calculation will automatically initiate. You can suppress the automatic calculation by checking Suppress_Automatic_Calculation on Project_Parameters, and the calculation can be run later as part of a batch calculation (for more information see section Data Entry for Begemann Mechanical CPT).
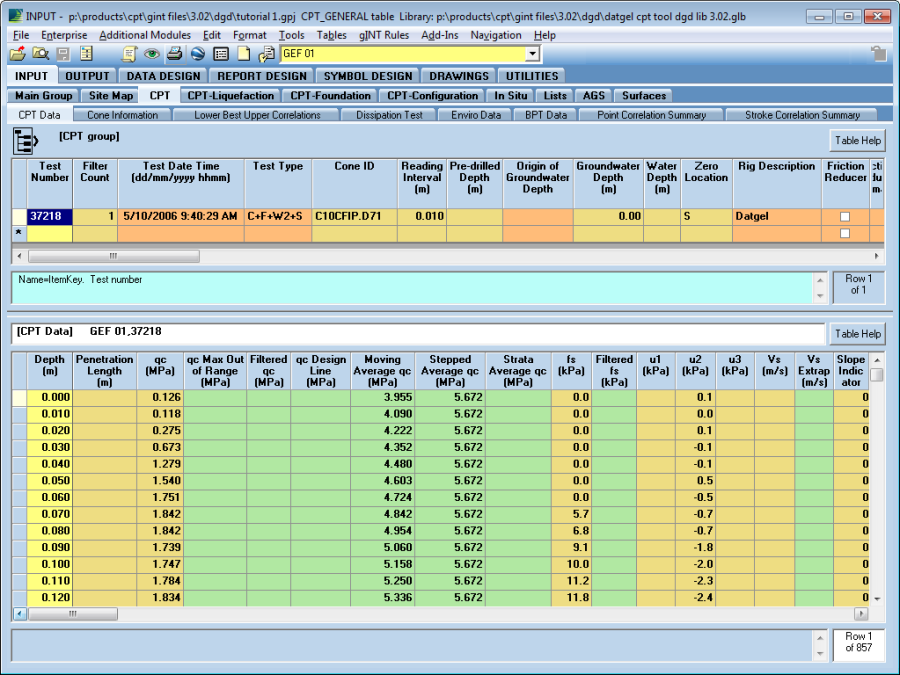
The resulting CPT | CPT_Data screen should look like this:
Transfer Summary of Material Description
A summary of the soil layers will be transferred to the Strata Main table. Select Add-Ins > Datgel CPT Tool > Transfer Description and Consistency for current PointID, then move to Main_Group | Strata_Main to see the transferred descriptions. You can edit the description data, and it will not be over written unless you run the Add-In again.
Output a Log
To produce a log output click on the OUTPUT tab.
From the Logs tab, click on the yellow drop down list and select the Report CPTU SU DR A3L. Then click on the PointID browse button and select PointID GEF_01.
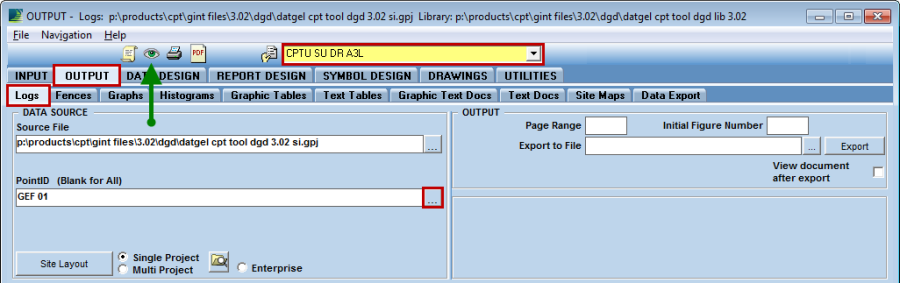
Then click preview, and you should see this: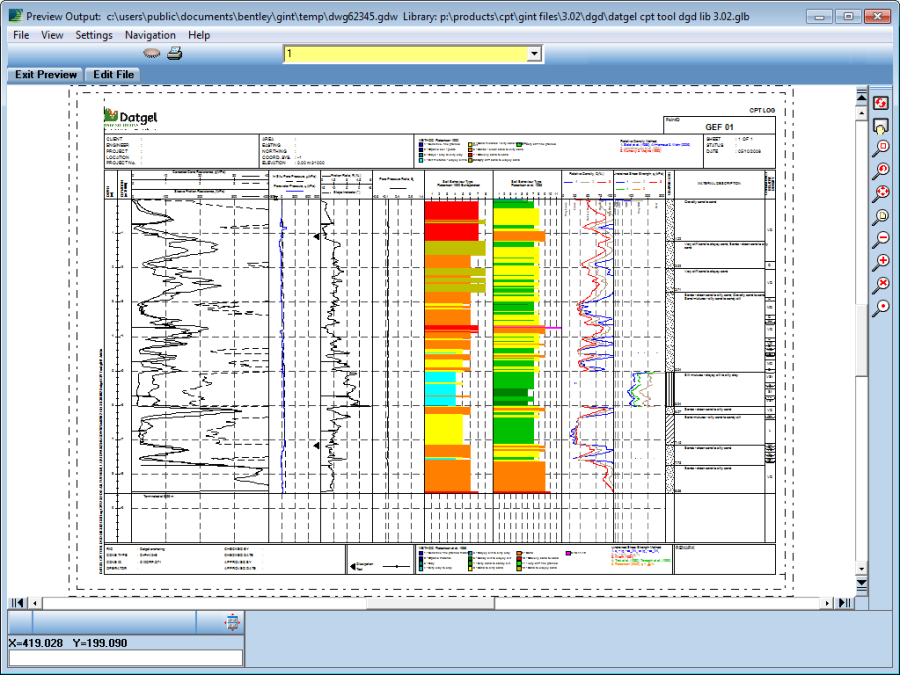
Export data
- Launch the Export Tool, by selecting Add-Ins > CPT Tool > Export Tool.
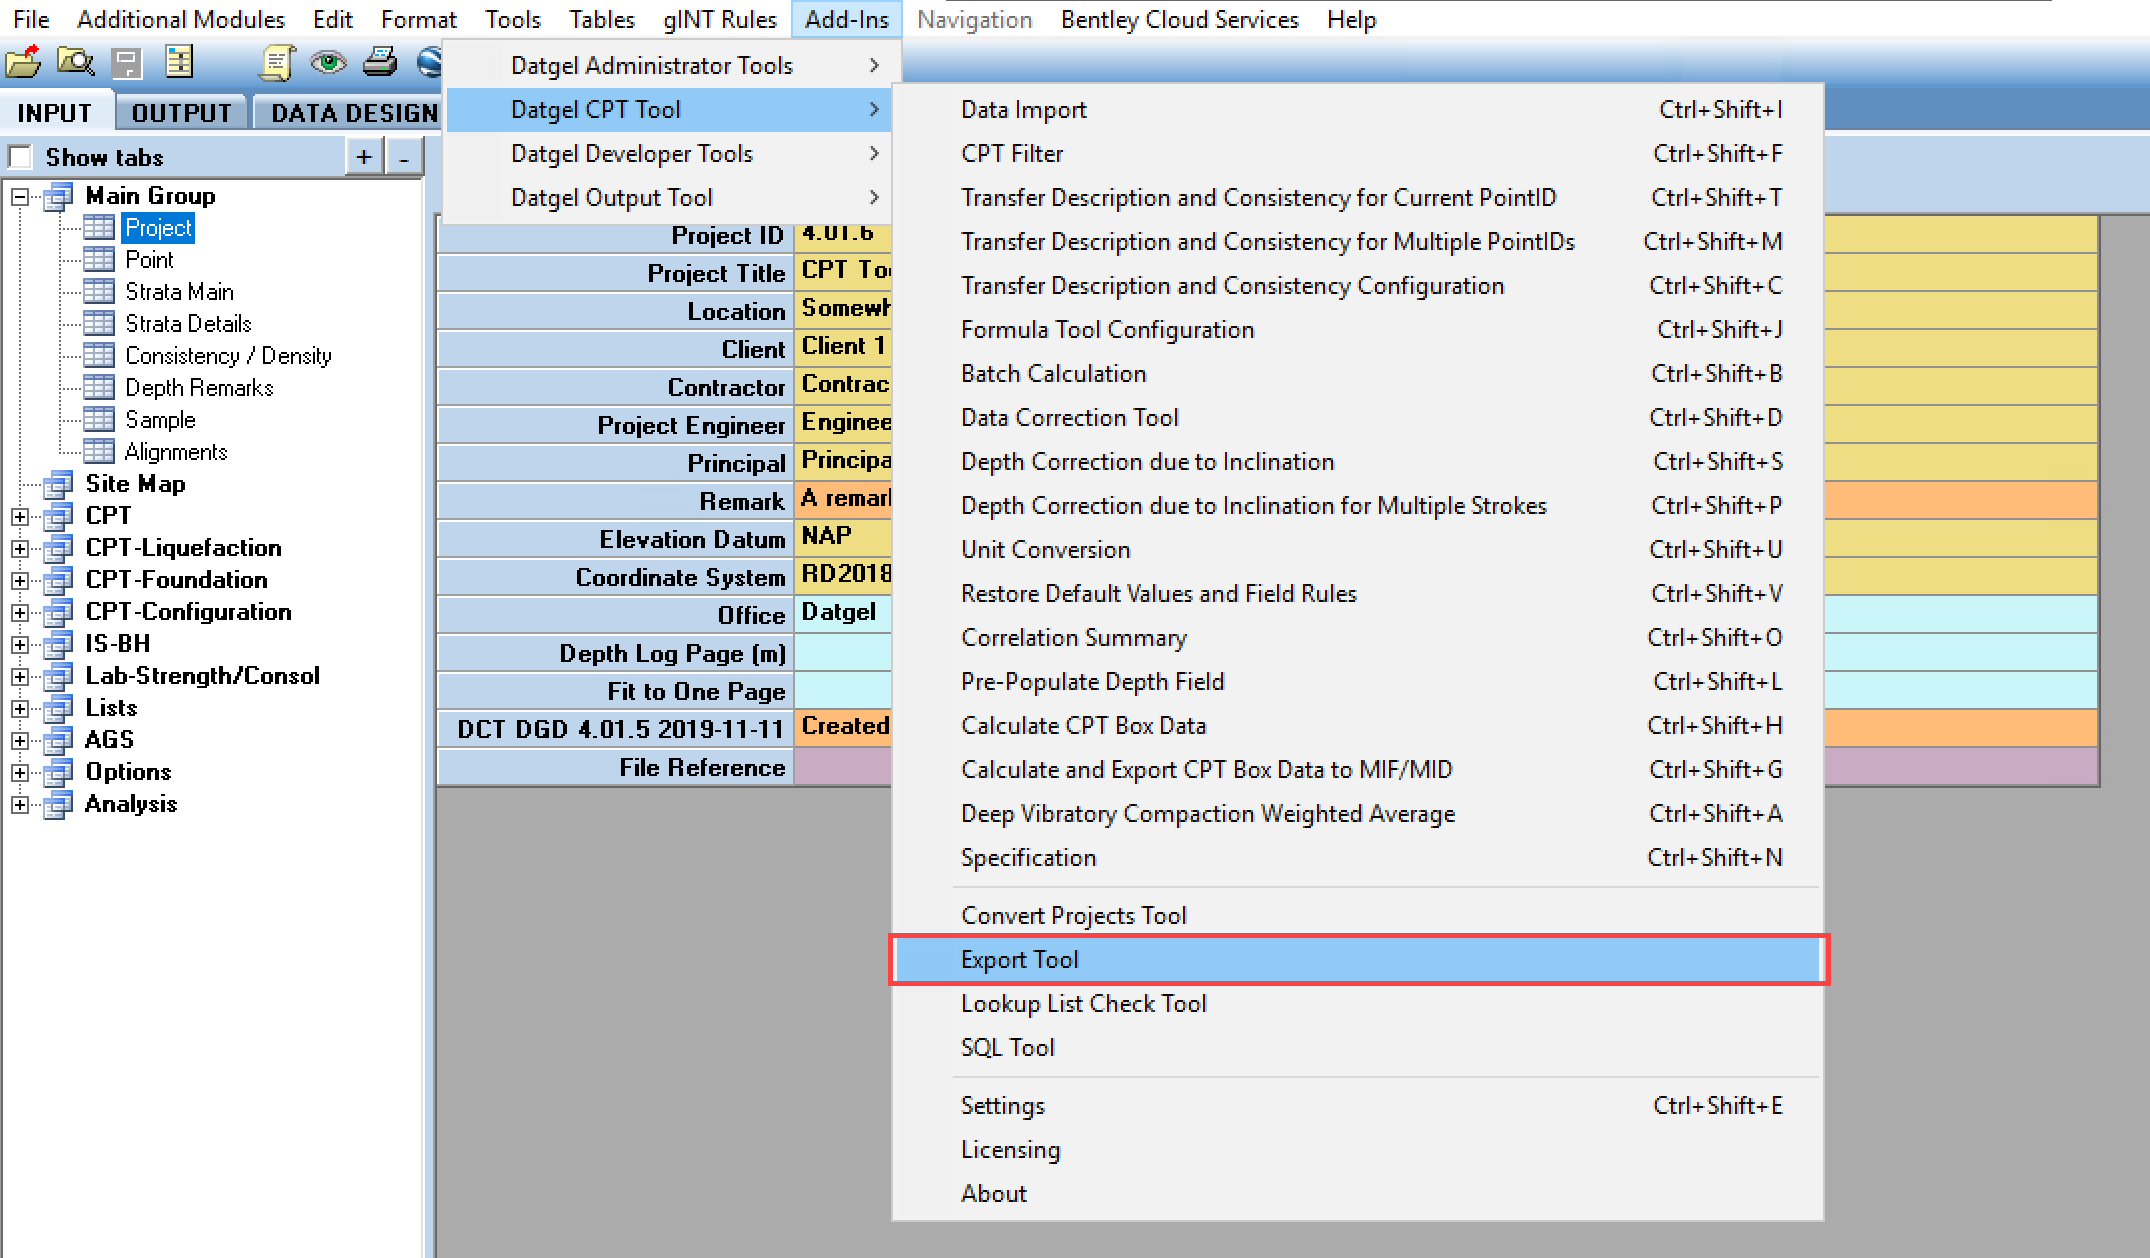
You should see the Export Tool form.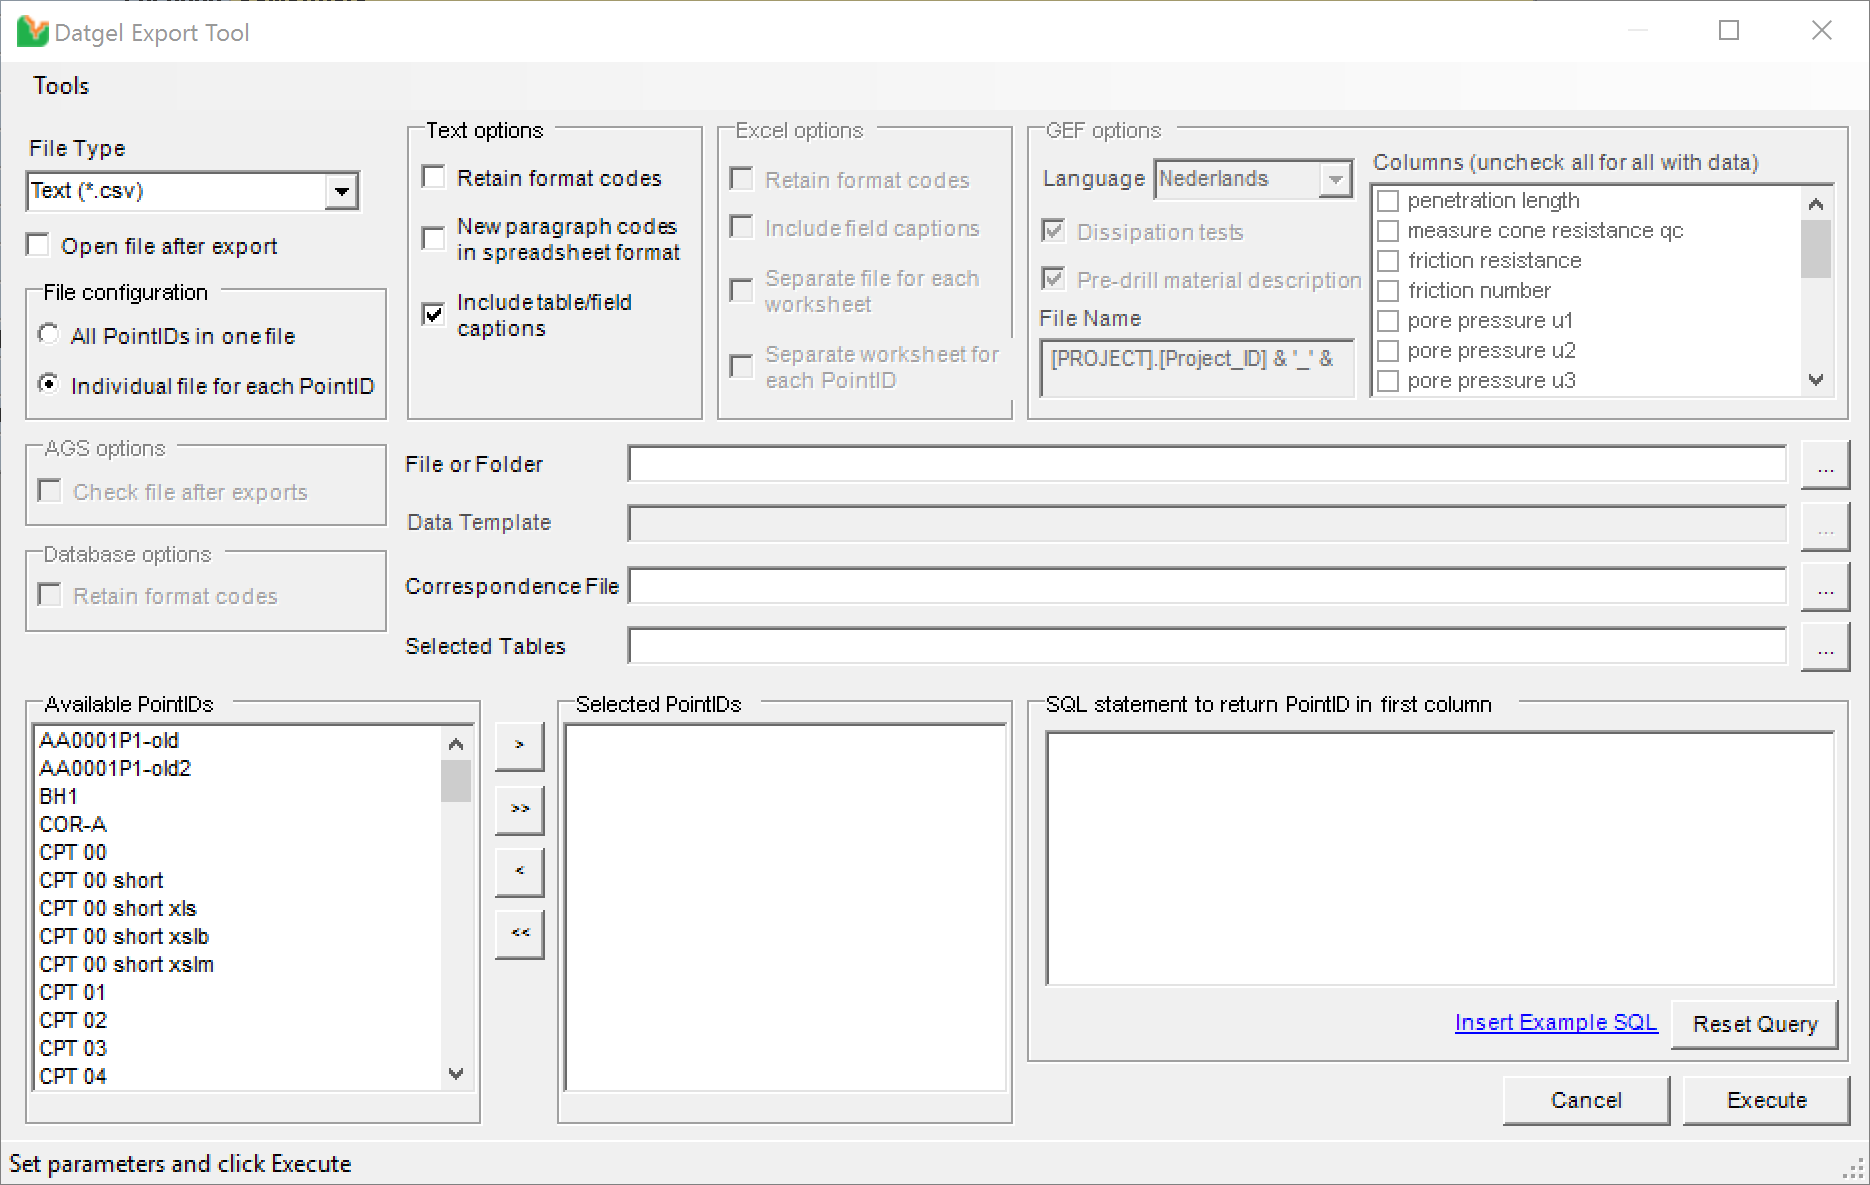
- In this tutorial we will export GEF files.
- Set File Type to GEF CPT-DATA (*.gef)
- Set the Language to Nederlands
- Check Dissipation test check box to export dissipation data
- Select the Browse... button and select a location to there the data will be exported.
- Select the Point GEF 01 under the Available PointIDs box and click the right arrow (
 ) to move it to the Selected PointIDs box.
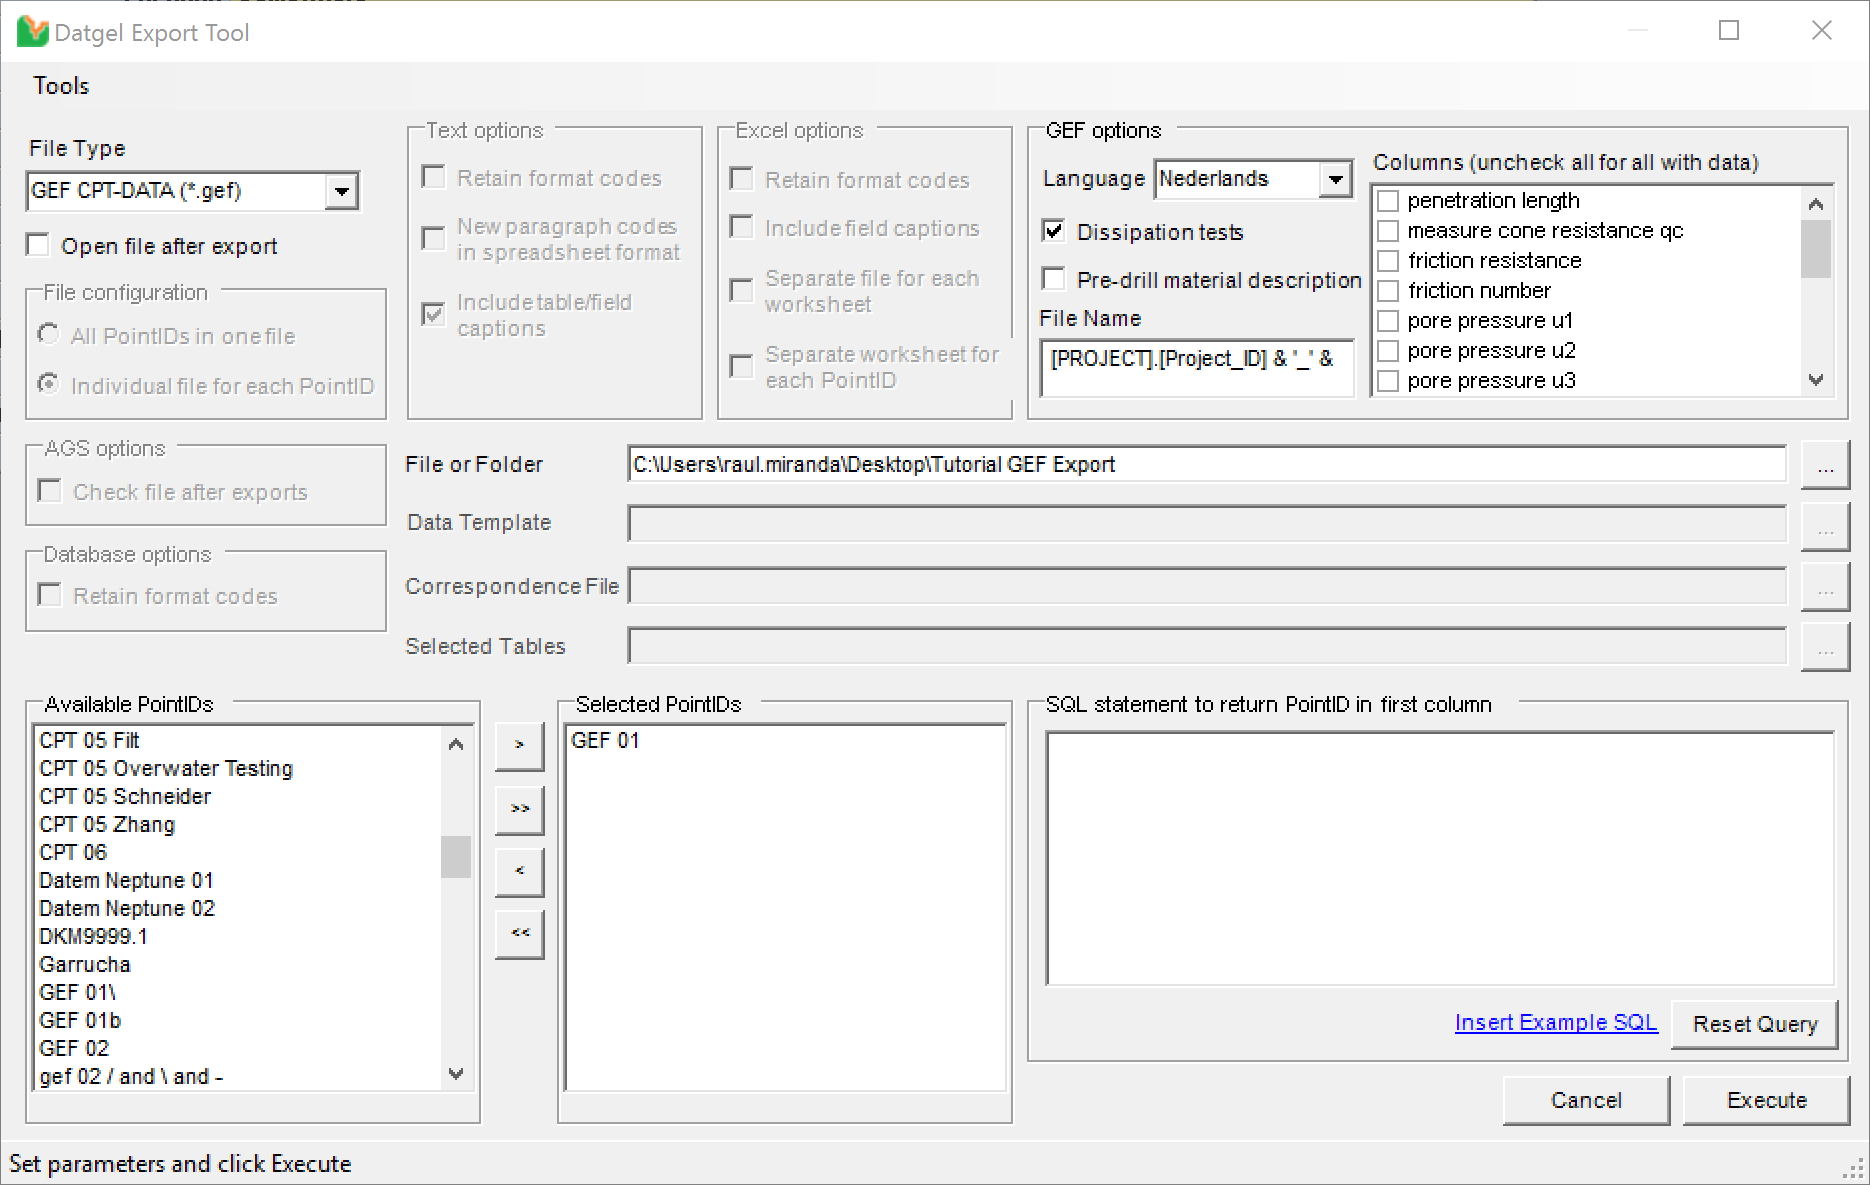
- Click Execute. There will be a short pause while the Datgel code translates the Data. Finally, when the export is complete a gINT Export Log form will display
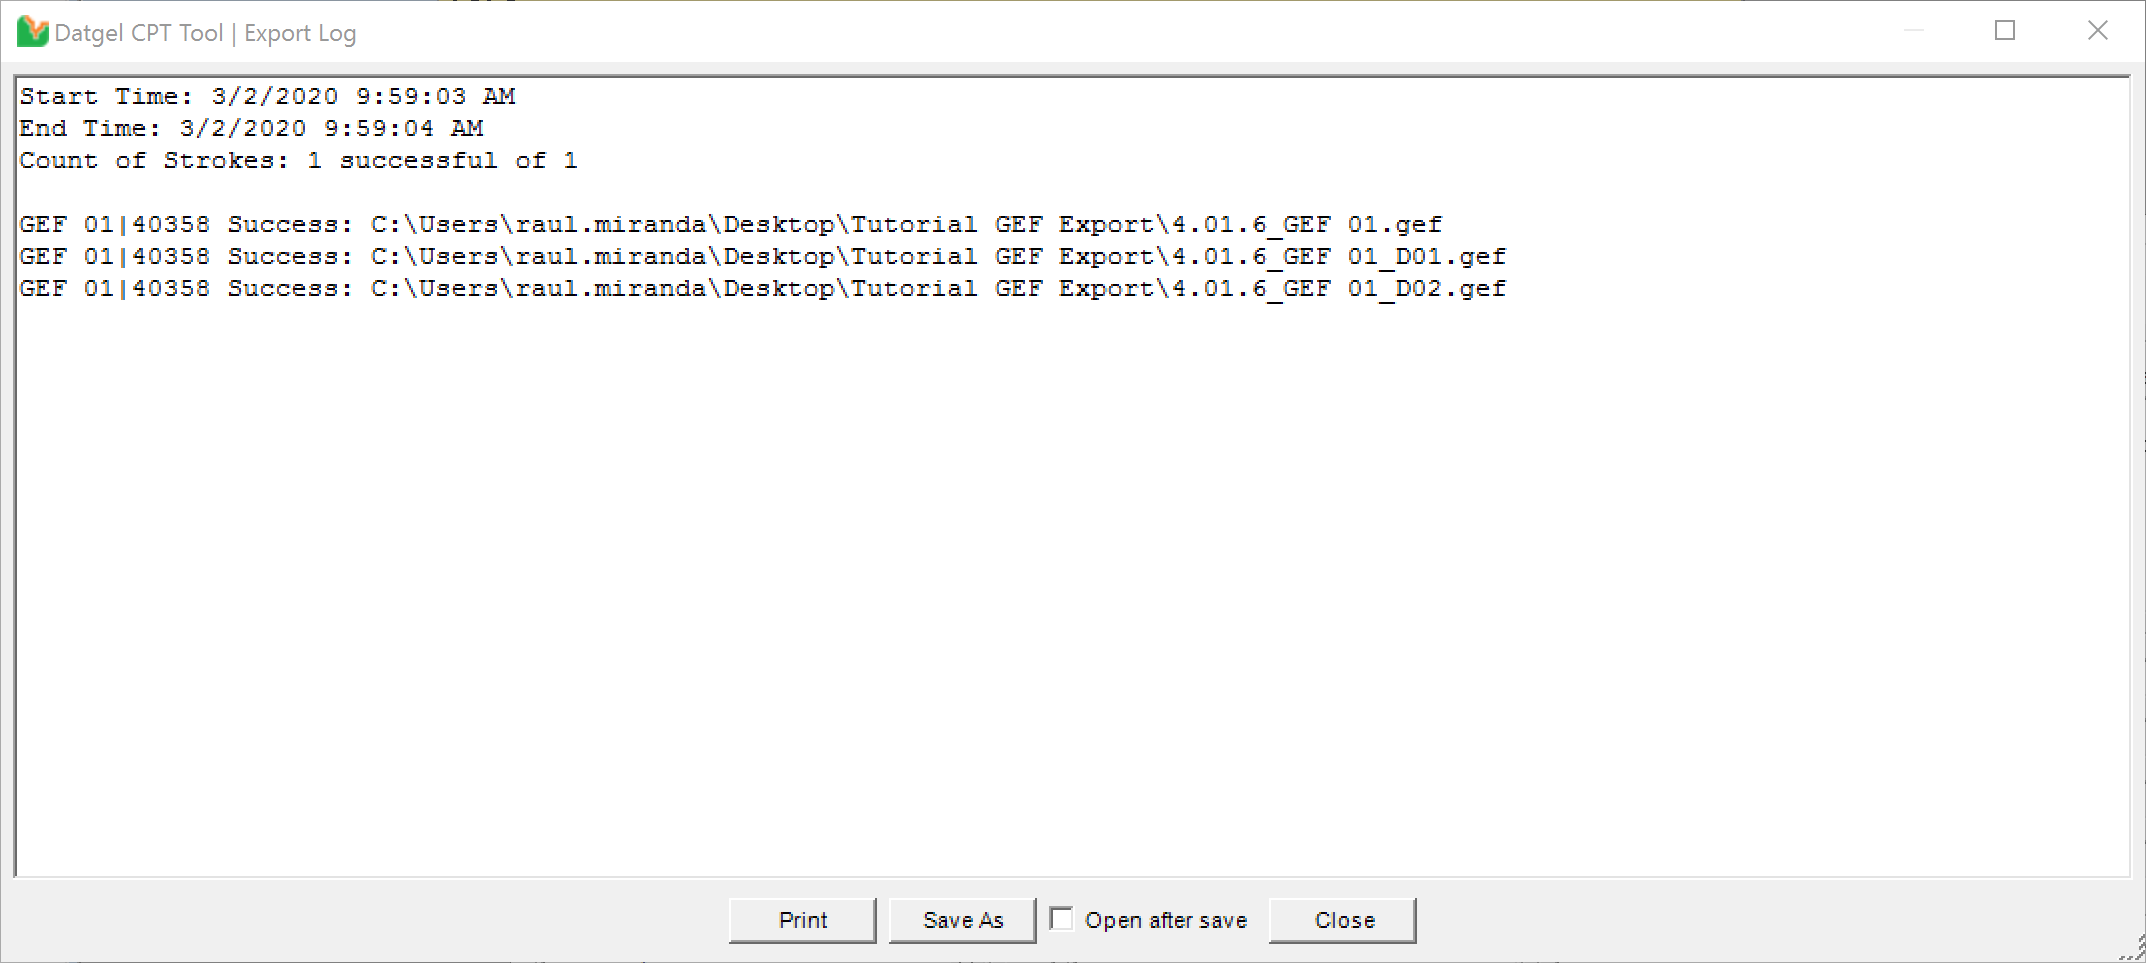
It can be useful to review the files created to confirm the data has exported. It will show export errors too.
You may now like to step through the folder and observe the exported data.
More Information
Refer to section Dissipation Test Analysis for a tutorial on that subject.
When you are comfortable with basic operations with the CPT Tool, you can learn about more advanced operations in section Tutorials.